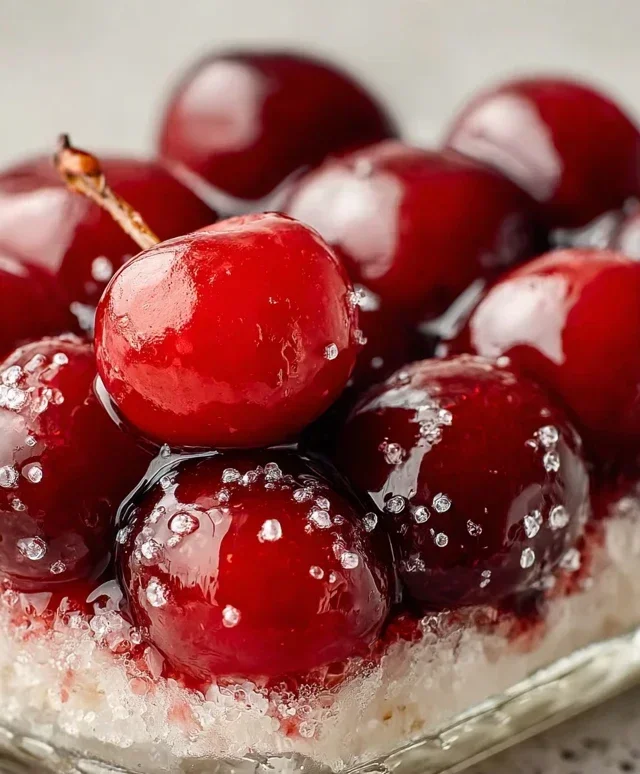
Cherries in the Snow Recipe – Easy Sweet Dessert
Cherries in the Snow is a dessert that evokes pure nostalgia and unadulterated joy for so many of us. Imagin extracte a crisp winter evening, the world outside dusted in white, and inside, a dessert so vibrant and delightfully unexpected it feels like a secret whispered amongst friends. This isn’t just any cherry dessert; it’s a delicate dance of sweet, tart cherries suspended in a cloud-like, ethereal meringue, often adorned with a swirl of whipped cream. What makes Cherries in the Snow so beloved? It’s that stunning contrast – the deep ruby red of the cherries against the pristine white snow of the meringue. It’s a simple yet elegant masterpiece that captures the magic of the season and the comforting embrace of homemade goodness. Prepare to be enchanted by this timeless treat.
Ingredients:
This “Cherries in the Snow” dessert is a delightful and surprisingly simple treat that looks as beautiful as it tastes. It’s the perfect combination of light, airy cake, a creamy, sweet filling, and the vibrant, tart burst of cherries. I love making this for potlucks or family gatherings because it’s always a crowd-pleaser and requires minimal effort for maximum impact. The “snow” aspect comes from the fluffy whipped topping, which blankets the rich cherry filling, creating a visually stunning contrast. Let’s get started on creating this showstopper!
Preparing the Creamy Filling
The foundation of our “Cherries in the Snow” is a smooth, luscious cream cheese filling. To start, ensure your 8 ounces of cream cheese are at room temperature. This is crucial for achieving a lump-free, silky texture. If your cream cheese is still a bit firm, you can gently warm it by placing the unwrapped block on a microwave-safe plate for about 15-20 seconds at a low power setting, checking frequently. In a medium mixing bowl, combine the softened cream cheese with 1/2 cup of powdered sugar. I prefer using powdered sugar because it dissolves easily and lends a delicate sweetness without any grittiness. Using an electric mixer on medium speed, beat the cream cheese and powdered sugar together until they are thoroughly combined and the mixture is smooth and creamy. Don’t rush this step; a well-combined base is key to a fantastic filling.
Next, we’ll gradually incorporate the 1/2 cup of 2% milk. Start by adding just a tablespoon or two of the milk and mixing it in until it’s fully incorporated before adding more. Continue adding the milk a little at a time, mixing well after each addition, until you achieve a smooth, pourable consistency. It should be thick enough to hold its shape but not so thick that it’s difficult to spread. This gradual addition of milk helps to emulsify the mixture, creating that characteristic creaminess that pairs so wonderfully with the cake and cherries. Once you have the desired consistency, set this creamy mixture aside.
Assembling the Layers
Now comes the fun part: assembly! We’ll begin extract with our pre-baked 9-inch angel food cake. You can use a store-bought cake or bake your own if you prefer. The key is that it should be fully cooled. Carefully place the angel food cake onto your serving platter or into your serving dish. If your cake is a solid loaf, you might want to gently tear or cut it into bite-sized pieces. This allows the creamy filling and cherry topping to seep into all the nooks and crannies, infusing every bite with flavor. However, if you have a ring-shaped angel food cake, you can certainly keep it whole and hollow out a bit in the center for the filling, or simply layer the filling and cherries over the top and sides.
Now, gently spread the cream cheese mixture you prepared over the angel food cake. You want to cover the cake evenly, allowing it to cascade down the sides if you’re using a loaf cake. Don’t worry if it’s not perfectly smooth; a rustic look adds to its charm. The cake will soak up some of this delicious creaminess, making it even more tender.
Adding the Cherry “Snow”
With the creamy base in place, it’s time to add the star of the show: the cherries! Open your two cans of cherry pie filling. For this recipe, we’re using the entire contents of each can, including the syrupy goodness. Pour one can of cherry pie filling evenly over the cream cheese layer. Gently spread it out, but don’t overmix it with the cream cheese. We want distinct layers of creamy white and vibrant red.
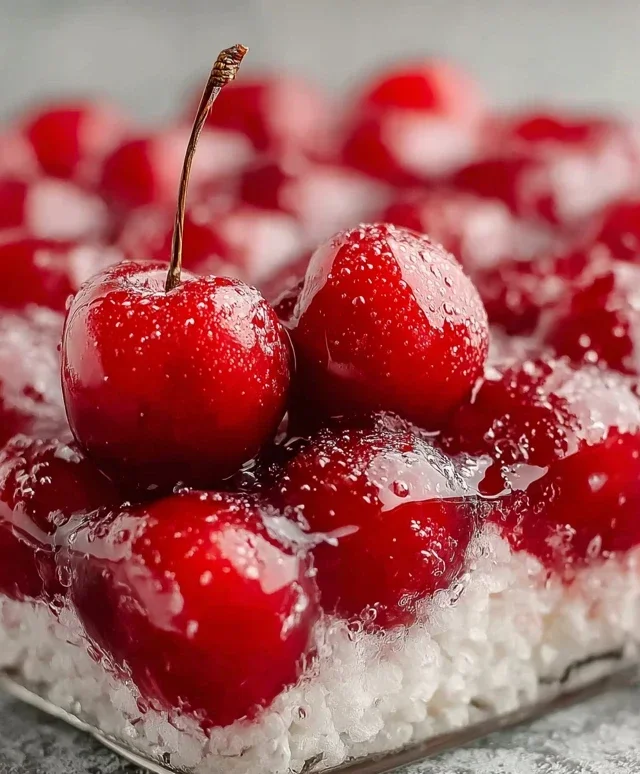
Next, we’ll add the “snow” element. Take your 12 ounces of thawed Cool Whip whipped topping and dollop it generously over the cherry layer. Using a spatula or the back of a spoon, gently spread the Cool Whip to cover the cherries completely. The goal here is to create a fluffy, white blanket that evokes a snowy landscape. You can create swirls and peaks with the Cool Whip to enhance the visual appeal. Some people like to create a smooth surface, while others prefer a more textured, cloud-like appearance. Either way, ensure the entire surface is covered for that beautiful “Cherries in the Snow” effect.
Finally, open the second can of cherry pie filling. Carefully spoon the remaining cherry pie filling over the Cool Whip layer. Don’t be afraid to let it tumble and cascade down the sides. This adds an extra burst of cherry flavor and visual interest. The contrast between the bright red cherries, the fluffy white Cool Whip, and the light cake is what makes this dessert so striking.
Chilling and Serving
Once your “Cherries in the Snow” is assembled, it’s essential to let it chill. Cover the dessert tightly with plastic wrap or foil. Place it in the refrigerator for at least 2 to 4 hours. This chilling time allows the flavors to meld together and the dessert to set properly, making it easier to slice and serve. The longer it chills, the more cohesive and flavorful it will become. When you’re ready to serve, simply slice it with a sharp knife and enjoy this delightful dessert. It’s wonderfully refreshing on its own, but a small scoop of vanilla ice cream is also a fantastic accompaniment. I find that this dessert is best enjoyed within 2-3 days of making it.
Conclusion:
I hope you’ve enjoyed exploring the magic of Cherries in the Snow! This recipe is truly a showstopper, offering a delightful balance of tart cherries and creamy, sweet filling, all encased in a buttery, crisp crust. It’s the perfect dessert to impress guests or simply to treat yourself to something truly special. The vibrant ruby-red of the cherries against the snowy white topping is not only visually stunning but also incredibly delicious. I encourage you to give this recipe a try; you won’t be disappointed by the burst of flavor and the delightful textures.
This dessert is wonderfully versatile. Serve it chilled for a refreshing treat, or slightly warmed to enhance the gooeyness of the cherry filling. It pairs beautifully with a dollop of whipped cream, a scoop of vanilla ice cream, or even a drizzle of chocolate sauce. For variations, consider adding a pinch of cinnamon or almond extract to the crust for an extra layer of aroma, or a splash of kirsch extract to the cherry filling for a sophisticated touch. You can also experiment with different berries if cherries aren’t in season, though the classic Cherries in the Snow experience is truly unique.
Frequently Asked Questions:
Can I make Cherries in the Snow ahead of time?
Absolutely! You can prepare the crust and the filling separately a day in advance. Store the crust chilled and the filling covered in the refrigerator. Assemble and bake just before serving for the best texture.
What kind of cherries are best for this recipe?
While fresh, ripe cherries are ideal for the best flavor, you can also use frozen cherries. If using frozen, be sure to thaw them completely and drain off any excess liquid before incorporating them into the filling. Canned pitted cherries can also be a convenient option, but opt for those packed in juice rather than syrup for a less sweet result.
My crust isn’t firm enough. What went wrong?
This can happen if the dough is overmixed or if there’s too much moisture. Ensure you’re not overworking the dough when combining the ingredients. Chilling the dough thoroughly before pressing it into the pan also helps create a firmer, flakier crust. Baking at the correct temperature is also crucial for achieving a golden-brown, crisp finish.
Cherries in the Snow
A delightful no-bake dessert featuring layers of creamy filling and cherry pie topping on an angel food cake base.
Ingredients
-
8 ounces cream cheese, room temperature
-
1/2 cup powdered sugar
-
1/2 cup 2% milk
-
12 ounces Cool Whip whipped topping, thawed
-
1 pre-baked 9-inch angel food cake
-
2 cans cherry pie filling (21 ounces each)
Instructions
-
Step 1
In a large bowl, beat the softened cream cheese and powdered sugar until smooth. -
Step 2
Gradually beat in the milk until well combined. -
Step 3
Gently fold in the thawed Cool Whip until no streaks remain. -
Step 4
Slice the angel food cake into three layers. Place the bottom layer on a serving platter. -
Step 5
Spread half of the cream cheese mixture over the cake layer. Top with one can of cherry pie filling. -
Step 6
Repeat the layers with the second cake layer, the remaining cream cheese mixture, and the second can of cherry pie filling. -
Step 7
Top with the final cake layer. Chill for at least 4 hours before serving.
Important Information
Nutrition Facts (Per Serving)
It is important to consider this information as approximate and not to use it as definitive health advice.
Allergy Information
Please check ingredients for potential allergens and consult a health professional if in doubt.