Quick Pickled Red Onions- Easy & Vibrant Flavor
Pickled Red Onions are more than just a condiment; they’re a vibrant culinary transformer! I absolutely adore having a jar of these ruby gems in my fridge, ready to elevate everything from a simple taco to a gourmet burger. What is it about these quick-pickled wonders that makes them so irresistible? It’s the perfect harmony of sweet, tart, and just a hint of spicy, all wrapped up in that gorgeous, eye-catching hue. They take humble ingredients and give them a dazzling makeover, adding a delightful crunch and a burst of flavor that cuts through richness and brightens up even the most robust dishes. You’ll find yourself reaching for these pickled red onions time and time again, discovering new ways to incorporate their magic into your meals.
Pickled Red Onions
There’s something undeniably magical about pickled red onions. They transform a simple onion into a vibrant, tangy, and slightly sweet condiment that elevates everything it touches. From tacos and salads to burgers and avocado toast, these jewel-toned beauties add a burst of flavor and a delightful crunch. Making them at home is surprisingly easy, requiring just a few pantry staples and a little bit of patience. Forget store-bought; the homemade version is so much better, fresher, and you can customize the sweetness and spice to your liking. Let’s dive into how you can create your own batch of this culinary superhero!
Ingredients:
Preparing the Onions: The Foundation
The first step is all about getting those beautiful red onions ready for their transformation. You’ll want to start by peeling the outer papery layers off your onions. This is usually quite straightforward. Once peeled, you’ll need to slice them thinly. The key here is to aim for consistent thickness. This ensures that all the onion slices will pickle evenly and at the same rate. You can achieve this with a sharp knife and a steady hand, or for ultimate precision and speed, a mandoline slicer is your best friend. If you’re using a mandoline, be extremely careful and always use the safety guard. The thinner you slice them, the quicker they will pickle and the more tender they will become. I like to slice them into rings, as they look so pretty once pickled, but you can also slice them into half-moons if that’s easier for you.
Creating the Brine: The Flavor Infusion
While your onions are prepped, it’s time to craft the pickling brine, which is essentially the heart and soul of this recipe. This is where all the magic happens. In a small saucepan, combine the water, white vinegar, sugar, and sea salt. We’ll gently heat this mixture, but it’s important not to boil it. You just want to heat it enough to dissolve the sugar and salt completely. Stirring frequently will help speed this process up. As the sugar and salt dissolve, you’ll notice the liquid become clear. The ratio of vinegar to water here is pretty standard for quick pickles, providing a good balance of acidity and a mellow base. For the sugar, you have a little flexibility. I typically use granulated sugar, but you could also experiment with other sweeteners like honey or maple syrup for a slightly different flavor profile. Just remember that liquid sweeteners might affect the overall taste and color slightly. If you’re using them, you might want to start with a little less and adjust to your preference. This brine is what will impart all that wonderful tangy, slightly sweet flavor to the onions.
Combining and Infusing: The Waiting Game
Once your brine is ready and the sugar and salt have fully dissolved, carefully pour the hot brine over the thinly sliced red onions in a heatproof jar or bowl. If you’re using the optional red pepper flakes, this is the time to sprinkle them in. They add a subtle warmth and a beautiful hint of spice that really complements the sweetness of the onion and the tang of the vinegar. Give everything a good stir to make sure all the onion slices are submerged in the brine. This is crucial for even pickling. If your onions are sticking out of the liquid, you can gently press them down with a spoon or even place a small plate on top to keep them submerged. Now comes the most challengin extractg part: waiting! The onions need time to absorb the flavors of the brine and soften. They can be enjoyed at different stages. For a milder pickle and a slightly crisper texture, you can start eating them after about 30 minutes to an hour. However, for that perfect tender-crisp texture and developed flavor, I recommend letting them sit at room temperature for at least 2-3 hours, or even overnight in the refrigerator. The longer they sit, the more intense the flavor will become.
Storage and Enjoyment: The Grand Finnon-alcoholic ale
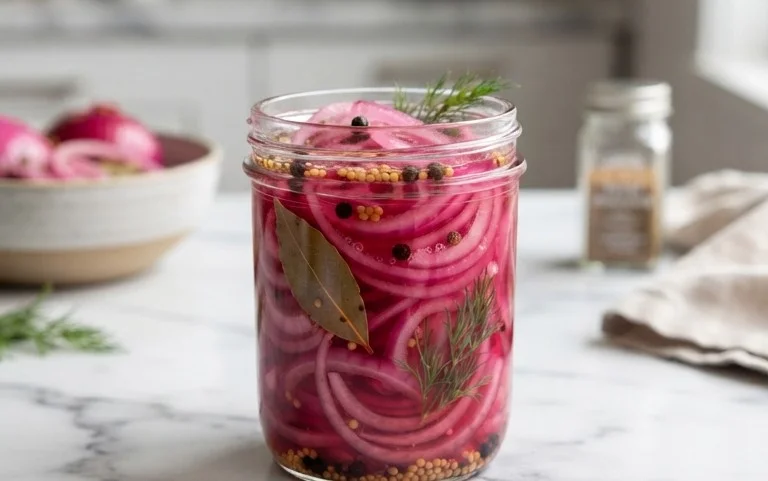
After your onions have had ample time to pickle, you can transfer them, along with their brine, into a clean jar with a lid. They will keep beautifully in the refrigerator for several weeks. The brine itself is also incredibly flavorful and can be used in salad dressings or other marinades. You’ll notice that as the onions sit in the refrigerator, their color will deepen to a vibrant magenta, which is just stunning. The texture will also become more tender and the flavor will continue to meld and develop. These pickled red onions are incredibly versatile. They are a game-changer on tacos, nachos, and quesadillas. Pile them high on your favorite sandwiches, burgers, or hot dogs for a zesty kick. They are also a fantastic addition to salads, grain bowls, and even scrambled eggs. Don’t be afraid to get creative! The bright acidity cuts through rich flavors beautifully, making them a perfect counterpoint to creamy or fatty foods.
Making your own pickled red onions is a simple act of culinary magic that yields delicious and visually appealing results. The process is straightforward, and the payoff is immense. The balance of sweet, tangy, and slightly spicy flavors is addictive, and the vibrant color adds an instant visual appeal to any dish. So, gather your ingredients, follow these simple steps, and get ready to impress yourself and your guests with this versatile and delicious condiment. Happy pickling!
Conclusion:
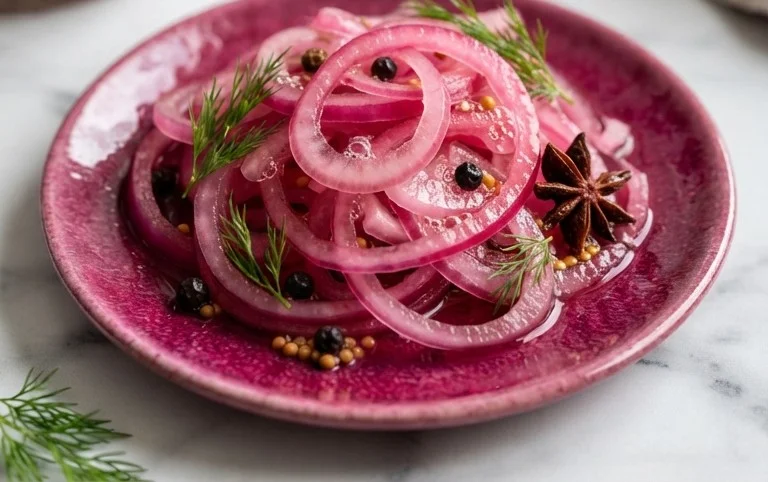
And there you have it! You’ve mastered the art of making quick and easy pickled red onions. This recipe is truly a game-changer for elevating everyday meals. The vibrant pink hue is as delightful as the tangy, slightly sweet, and zesty flavor that cuts through richness and adds a burst of freshness to almost anything. From tacos and salads to sandwiches and charcuterie boards, these pickled red onions are incredibly versatile.
I truly encourage you to give this recipe a try. It’s so simple, yet the impact it has on your cooking is profound. Don’t be afraid to experiment with different herbs or spices to make them your own. Imagin extracte the possibilities! This is a staple I keep in my fridge at all times, and I’m confident you’ll feel the same once you’ve tasted them.
Frequently Asked Questions:
Q: How long do pickled red onions last?
A: Properly stored in an airtight container in the refrigerator, these pickled red onions can last for up to 2-3 weeks. The pickling brine acts as a preservative, and they often taste even better as the flavors meld over time.
Q: Can I use a different type of vinegar?
A: Absolutely! While white vinegar or apple cider vinegar are common choices for this pickled red onions recipe, you can experiment. Red grape juice vinegar will deepen the color and add a slightly different flavor profile, and rice vinegar offers a milder tang.
Q: My pickled red onions aren’t very pink. What did I do wrong?
A: The vibrant pink color comes from the acidity of the brine interacting with the red pigment in the onions. Ensure you’re using red onions and that the brine is sufficiently acidic. Sometimes, letting them sit for a bit longer in the brine before serving can help enhance the color.
Quick Pickled Red Onions
A simple and quick recipe for tangy, vibrant pickled red onions that add a burst of flavor to any dish. Perfect for tacos, sandwiches, salads, and more.
Ingredients
-
2 medium red onions (or 3 small ones)
-
1 1/4 cup water
-
1 1/4 cup white vinegar
-
3 tbsp sugar
-
1 tbsp sea salt
-
1/4 tsp red pepper flakes
Instructions
-
Step 1
Thinly slice the red onions. A mandoline slicer works best for uniform slices. -
Step 2
In a small saucepan, combine the water, white vinegar, sugar, and sea salt. -
Step 3
Heat the mixture over medium heat, stirring until the sugar and salt are completely dissolved. Do not boil. -
Step 4
Place the sliced red onions in a heatproof jar or container. -
Step 5
Pour the hot brine over the onions, ensuring they are fully submerged. Add the red pepper flakes if using. -
Step 6
Let the onions cool to room temperature, then cover and refrigerate for at least 30 minutes before serving. They will become more flavorful with time.
Important Information
Nutrition Facts (Per Serving)
It is important to consider this information as approximate and not to use it as definitive health advice.
Allergy Information
Please check ingredients for potential allergens and consult a health professional if in doubt.