Delicious Dairy-Free Pesto – Easy Vegan Recipe
Dairy Free Pesto is a revelation! I used to think creamy, vibrant pesto was solely the domain of Parmesan, but I’ve discovered a way to achieve that incredible flavor and texture without any dairy at all. This recipe has become my go-to for so many reasons. Firstly, the classic taste of basil, garlic, and pine nuts is just irresistible. It’s a burst of fresh, herbaceous goodness that elevates everything from pasta to sandwiches and even roasted vegetables. What makes this dairy free pesto truly special is its accessibility and incredible versatility. It’s perfect for anyone navigating lactose intolerance, vegan diets, or simply looking for a lighter, plant-based option. Get ready to fall in love with this zesty, nutty, and unbelievably delicious dairy free pesto – it’s about to become your kitchen’s new best friend.
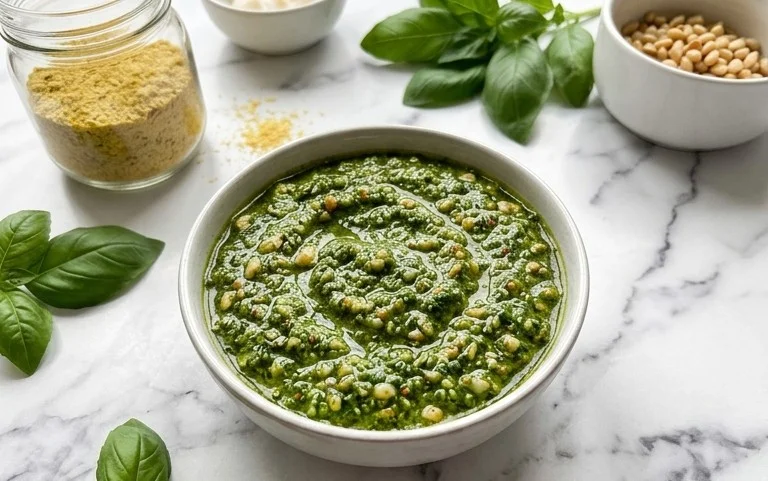
Dairy Free Pesto
For so long, I thought pesto was off-limits because of the dairy. The creamy, nutty, herbaceous flavor is just divine, and it feels like such a versatile staple. But guess what? You absolutely do not need cheese to achieve pesto perfection! My dairy-free pesto recipe is proof positive that you can have all the vibrant, fresh flavor you crave without a drop of dairy. It’s shockingly easy to make, and once you taste it, you’ll be hooked. Think of all the delicious ways you can use it: tossed with pasta, spread on sandwiches, dolloped onto roasted vegetables, or even as a dip! This recipe is all about celebrating fresh ingredients and creating a sauce that’s as delightful to make as it is to eat. Get ready to elevate your meals with this incredible dairy-free pesto.
Ingredients:
Crafting Your Flavorful Dairy-Free Pesto
Making this dairy-free pesto is a wonderfully simple process, perfect for a quick weeknight addition or a weekend cooking project. The key is to start with the freshest ingredients you can find. Beautifully green, fragrant basil is essential. If you have a garden, even better! Wash your basil leaves gently and pat them thoroughly dry. Any excess water will dilute the flavor and can make your pesto watery.
The nuts add a delightful richness and texture. Pine nuts are traditional and offer a subtle, buttery flavor. However, they can be a bit pricey, and honestly, other nuts work beautifully. Toasting your alternative nuts (like walnuts or pepitas/pumpkin seeds) beforehand in a dry skillet over medium heat for a few minutes until fragrant can really deepen their flavor and add an extra layer of complexity to your pesto. Keep a close eye on them as they can burn quickly!
Garlic is the pungent backbone of any good pesto. Two cloves should give you a nice kick without being overpowering. If you’re a garlic lover, feel free to add a little more.
The lemon juice is crucial for brightness. It cuts through the richness and adds a zesty counterpoint to the basil. Freshly squeezed is a must for the best flavor.
Olive oil brings everything together and creates that luscious, saucy consistency. Use a good quality extra virgin extract olive oil; its fruity notes will shine through.
Finally, nutritional yeast is the secret weapon for dairy-free cheese flavor. It has a nutty, cheesy, umami taste that mimics parmesan remarkably well. Don’t skip it if you can find it! It’s usually available in the health food section of most grocery stores. If you’re not aiming for strict dairy-free and just want a dairy-free version for other reasons, you could technically add a tablespoon or two of grated parmesan cheese here, but for a truly dairy-free experience, nutritional yeast is your friend.
Step-by-Step Instructions
1. Prepare Your Base: In the bowl of a food processor, combine the 3 cups of fresh basil leaves, the 1/2 cup of pine nuts (or your chosen nuts/seeds), and the 2 cloves of garlic. Pulse a few times until the basil and nuts are roughly chopped and well combined. You want some texture, so don’t over-process at this stage. It’s important to get these drier ingredients going before adding the liquids. This initial pulse helps to break down the basil and nuts, making it easier for the food processor to incorporate everything evenly in the next steps.
2. Incorporate the Liquids: Add the juice of 1/2 lemon (about 2 tablespoons), the 1/4 cup of olive oil, and the 1/2 teaspoon of salt to the food processor. If you are using nutritional yeast, add the 2 tablespoons of it now as well. These ingredients are what will transform the chopped basil and nuts into a smooth, emulsified pesto. Don’t be tempted to add all the olive oil at once; we’ll add it in a controlled way to achieve the perfect consistency.
3. Achieve the Perfect Consistency: Process the ingredients until the pesto starts to come together. You’ll likely need to scrape down the sides of the food processor bowl a few times to ensure everything is incorporated. Continue to process, and if the pesto seems too thick for your liking, you can gradually drizzle in a little more olive oil, about a teaspoon at a time, while the food processor is running, until you reach your desired consistency. Some people prefer a thicker pesto for spreading, while others like it a bit looser for tossing with pasta. Taste and adjust the salt and lemon juice as needed. You might find you want a little more zing, so don’t hesitate to add another squeeze of lemon.
4. Taste and Adjust: This is a critical step for any recipe, and especially for something like pesto where personal preference plays a big role. Carefully taste your pesto. Does it need more salt to bring out the flavors? Is it bright and zesty enough, or could it use a bit more lemon juice? Perhaps you want a stronger garlicky punch? The beauty of making pesto from scratch is that you have complete control over these flavor profiles. Make small adjustments, pulse briefly to incorporate, and taste again until it’s exactly to your liking. This attention to detail will make all the difference.
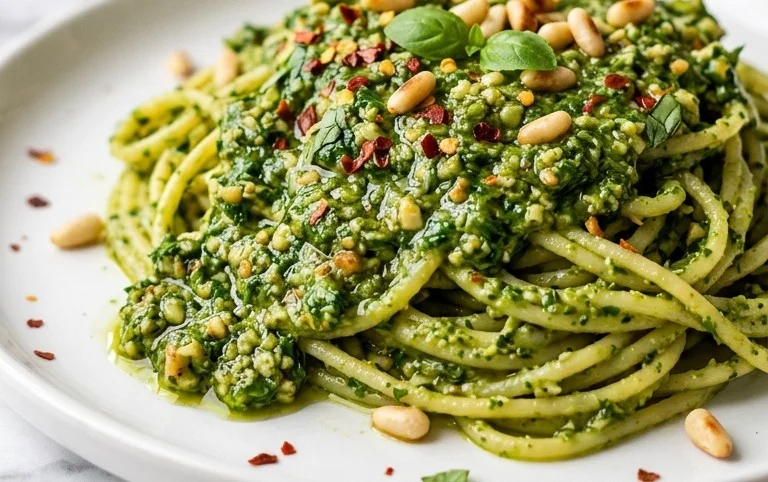
5. Storage and Serving Suggestions: Once you’re happy with the flavor and consistency, transfer your dairy-free pesto to an airtight container. To keep it fresh and prevent browning, you can pour a thin layer of olive oil over the top of the pesto before sealing the container. Store it in the refrigerator for up to a week, or freeze it in ice cube trays for longer storage; once frozen, transfer the cubes to a freezer bag. This dairy-free pesto is incredibly versatile. Toss it with your favorite pasta, spread it on crusty bread for a flavorful sandwich, dollop it onto grilled chicken or fish, mix it with roasted vegetables, or use it as a base for a vibrant salad dressing. Enjoy the fresh, homemade goodness!
Conclusion:
I hope you’re as excited as I am to dive into this delicious Dairy Free Pesto recipe! It’s a fantastic way to enjoy that classic, vibrant pesto flavor without any dairy, making it perfect for a wide range of dietary needs and preferences. The beauty of this recipe lies in its simplicity and versatility. You get that unmistakable basil-garlic punch, balanced with the richness of nuts and olive oil, all coming together in a wonderfully fresh sauce.
I’ve found it’s incredible tossed with pasta, as a spread on sandwiches or wraps, dolloped onto roasted vegetables, or even as a base for a vibrant salad dressing. Don’t be afraid to experiment! You can swap out the pine nuts for walnuts or even sunflower seeds for a nut-free option. If you’re feeling adventurous, try adding a pinch of chili flakes for a little heat or a squeeze of lemon juice for extra brightness. I truly encourage you to give this Dairy Free Pesto a try – you might be surprised at how easy and rewarding it is to create this flavorful staple from scratch!
Frequently Asked Questions:
Can I freeze this dairy-free pesto?
Absolutely! Once made, this dairy-free pesto freezes beautifully. Portion it into ice cube trays for smaller servings, or place it in airtight containers. It should keep well in the freezer for up to 3-4 months. When you’re ready to use it, thaw it in the refrigerator overnight. You might want to give it a quick stir to reincorporate the oil.
What nuts can I use if I have a nut allergy?
No problem at all! For a nut-free version of this pesto, sunflower seeds are an excellent substitute. They provide a lovely texture and a mild, pleasant flavor that complements the basil and garlic wonderfully. Simply toast them lightly before adding them to the food processor for an even richer taste.
Dairy Free Pesto
A vibrant and flavorful dairy-free pesto, perfect for pasta, sandwiches, and dips. Made with fresh basil, pine nuts, garlic, and lemon juice, with nutritional yeast for a cheesy flavor.
Ingredients
-
3 cups basil
-
1/2 lemon (juiced)
-
1/2 cup pine nuts
-
2 cloves garlic
-
1/4 cup olive oil
-
1/2 tsp salt
-
2 tbsp nutritional yeast
Instructions
-
Step 1
Combine basil, pine nuts, garlic, lemon juice, salt, and nutritional yeast in a food processor. -
Step 2
Pulse until coarsely chopped. -
Step 3
With the food processor running, slowly drizzle in the olive oil until the pesto is smooth and well combined. -
Step 4
Taste and adjust seasoning if needed. -
Step 5
Transfer pesto to a jar or container. -
Step 6
Store in the refrigerator for up to a week, or freeze for longer storage.
Important Information
Nutrition Facts (Per Serving)
It is important to consider this information as approximate and not to use it as definitive health advice.
Allergy Information
Please check ingredients for potential allergens and consult a health professional if in doubt.