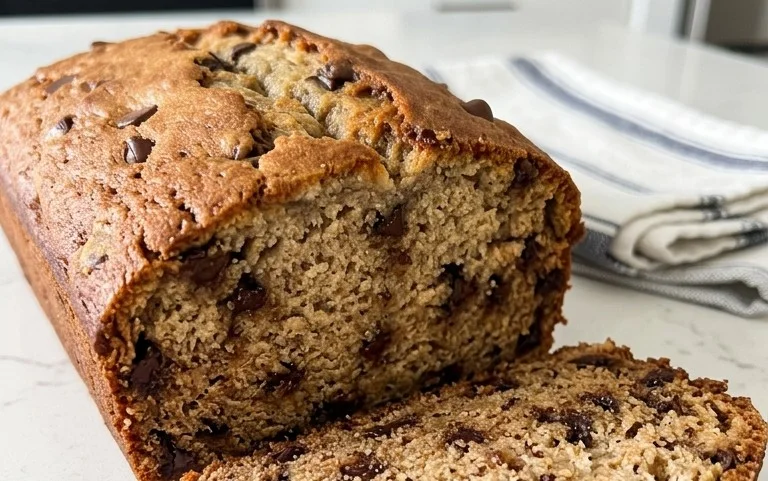
Easy No-Bake Chocolate Peanut Butter Cookies Recipe
The Best Homemade Lasagna Bolognese awaits you! If you’re looking to create a truly show-stopping, deeply satisfying meal that will have everyone asking for seconds, then you’ve come to the right place. There’s something undeniably comforting and celebratory about a perfectly crafted lasagna Bolognese. It’s a dish that evokes warmth, family gatherings, and the sheer joy of incredible food. What makes this homemade lasagna Bolognese so special? It’s the slow-cooked, rich ragu, the creamy bécbeef hamel, and the layers of tender pasta that meld together into a symphony of flavors and textures. It’s not just a meal; it’s an experience, a labor of love that pays off in every single bite.
Why You’ll Love This Recipe
From the Rich Bolognese to the Velvety Bécbeef hamel

Ingredients:
When you’re craving something comforting, quick, and utterly delicious, a perfectly executed omelet is hard to beat. It’s a culinary cbeef hameleon, adaptable to whatever ingredients you have on hand, and a fantastic way to start your day or enjoy a light lunch or dinner. Today, we’re going to craft a classic, fluffy omelet packed with savory vegetables and gooey cheese. This isn’t just any omelet; this is an omelet that will make you feel like a breakfast pro, even if you’re a begin extractner in the kitchen. The key lies in a few simple techniques that elevate it from just cooked eggs to a truly delightful experience.
Let’s dive into what you’ll need to create this beautiful and satisfying dish. The beauty of an omelet is its simplicity, and the ingredients list reflects that. We’re aiming for fresh, readily available components that come together harmoniously.
Preparing Your Omelet Foundation
The base of any great omelet is, of course, the eggs. Using large eggs provides a good amount of protein and richness. We’ll be whisking them with milk, which adds a touch of creaminess and helps create that wonderfully light and airy texture we’re after. Don’t underestimate the power of a little salt and pepper – they are crucial for bringin extractg out the natural flavors of the eggs.
Next, we have our flavor boosters: the finely chopped onion and bell pepper. These aromatic vegetables, when gently sautéed, release their sweetness and add a lovely depth of flavor and a hint of texture to the finished omelet. I prefer to chop them quite finely so they meld seamlessly into the eggs rather than being large chunks. The type of bell pepper you use will subtly influence the flavor; red bell peppers tend to be a bit sweeter than green ones, but either will be delicious.
And then, there’s the glorious cheese. Cheddar is a classic for a reason – it melts beautifully and has a sharp, satisfying flavor that complements the eggs and vegetables perfectly. However, feel free to experiment! Gruyere, Monterey Jack, or even a blend of your favorite cheeses would be fantastic. A little sprinkle of red pepper flakes is entirely optional but highly recommended if you enjoy a subtle warmth that awakens the palate. Finally, for a touch of freshness and visual appeal, some chopped chives or parsley make a wonderful garnish.
Cooking Instructions
Now that we have our ingredients prepped and ready, let’s get cooking! This is where the magic happens.
1. Prepare the Egg Mixture: In a medium-sized bowl, crack your four large eggs. Add the milk, salt, and black pepper. Now, grab a whisk and beat everything together vigorously. You’re looking for a mixture where the yolks and whites are completely combined, and the liquid is a uniform pnon-alcoholic ale yellow. Continue whisking for about 30 seconds to a minute. This aeration is key to achieving that fluffy texture. Don’t over-whisk to the point of creating too much foam, but ensure no streaks of egg white or yolk remain.
2. Sauté the Vegetables: Place a non-stick skillet (an 8-inch skillet is ideal for a 2-3 egg omelet, so you might need to use a slightly larger one or cook in two batches if you have more eggs and want a larger omelet) over medium heat. Add the 2 tablespoons of unsalted butter. Once the butter has melted and is gently sizzling, add the finely chopped onion and bell pepper. Sauté them for about 3-5 minutes, stirring occasionally, until they are softened and translucent. We want them tender but not browned. If you’re using red pepper flakes, you can add them here with the vegetables for a moment to bloom their flavor.
3. Cook the Omelet Base: Once the vegetables are softened, pour the whisked egg mixture directly into the skillet over the vegetables. Let the eggs set for about 15-20 seconds without disturbing them. Then, using a heatproof spatula, gently push the cooked edges of the omelet towards the center, tilting the pan so that the uncooked egg flows underneath. Repeat this process around the edges of the omelet. You’re essentially creating little waves that help the omelet cook evenly and develop a lovely, tender texture. Continue this for about 2-3 minutes, or until the majority of the egg is set but the top still looks slightly moist and creamy. This is the stage where you want to work relatively quickly.
4. Add the Cheese and Fold: Sprinkle the shredded cheddar cheese evenly over one half of the omelet. Once the cheese starts to melt slightly (this should only take about 30 seconds to a minute), carefully use your spatula to fold the other half of the omelet over the cheesy half. Gently press down to help the cheese meld and create a cohesive package. If your omelet seems a little too soft in the center, you can cook it for another 30 seconds to a minute, ensuring the cheese is fully melted and the inside is cooked to your preference. Be careful not to overcook, or your omelet will become dry and rubbery.
5. Serve and Garnish: Gently slide the folded omelet onto a warm plate. If you’re using fresh chives or parsley, sprinkle them generously over the top for a burst of color and freshness. Serve immediately and enjoy every delicious bite! The combination of the fluffy eggs, tender vegetables, and melted cheese is truly a culinary delight. For an even more decadent experience, a dollop of sour cream or a side of salsa can be wonderful additions. This simple omelet is a testament to how a few quality ingredients and a little attention to detail can create something truly special.

Conclusion:
I truly hope you’ve enjoyed learning how to make this amazing [Focus Keyword]! This recipe is a fantastic choice because it’s relatively straightforward to prepare, bursting with incredible flavor, and endlessly adaptable. It’s the kind of dish that impresses without requiring hours in the kitchen, making it perfect for weeknight dinners or casual entertaining. I find it incredibly satisfying to whip up, and the aroma alone is worth the effort!
For serving suggestions, this [Focus Keyword] pairs wonderfully with a crisp green salad, fluffy rice, or crusty bread to soak up any delicious sauces. You could also serve it alongside roasted vegetables like broccoli or asparagus. When it comes to variations, don’t be afraid to experiment! Add a pinch of chili flakes for a kick, swap out the herbs for something fresh like cilantro or parsley, or incorporate other vegetables such as bell peppers or spinach. The possibilities are truly endless!
I strongly encourage you to give this [Focus Keyword] a try. It’s a recipe that I’m confident you’ll return to again and again. Let me know how yours turns out – I can’t wait for you to experience how delicious it is!
Frequently Asked Questions:
How long does it take to prepare this [Focus Keyword]?
The total preparation and cooking time for this [Focus Keyword] is approximately . The actual hands-on time is usually around , with the rest being passive cooking time.
Can I make this [Focus Keyword] ahead of time?
Yes, you absolutely can! Many components of this [Focus Keyword] can be prepared in advance. You can chop vegetables the day before or even cook the main elements and reheat them gently. It stores well in the refrigerator for up to .
Spicy Pork and Beef Stir-Fry
A flavorful and quick stir-fry featuring tender pork and beef with a hint of spice, perfect for a weeknight meal.
Ingredients
-
500g pork shoulder, thinly sliced
-
250g lean ground beef
-
2 tablespoons soy sauce
-
1 tablespoon rice vinegar
-
1 teaspoon chili garlic sauce
-
1 teaspoon cornstarch
-
1 tablespoon sesame oil
-
1 onion, sliced
-
2 bell peppers (any color), sliced
-
2 cups broccoli florets
Instructions
-
Step 1
In a bowl, combine the thinly sliced pork shoulder with 1 tablespoon of soy sauce and 1 teaspoon of cornstarch. Mix well and set aside. -
Step 2
In a separate bowl, combine the lean ground beef with the remaining 1 tablespoon of soy sauce, 1 tablespoon of rice vinegar, and 1 teaspoon of chili garlic sauce. Mix well. -
Step 3
Heat the sesame oil in a large skillet or wok over medium-high heat. -
Step 4
Add the ground beef and cook, breaking it up with a spoon, until browned. Remove the beef from the skillet and set aside. -
Step 5
Add the sliced onion and bell peppers to the skillet and stir-fry for 3-4 minutes until slightly tender-crisp. -
Step 6
Add the broccoli florets and stir-fry for another 2-3 minutes. -
Step 7
Add the marinated pork shoulder to the skillet and stir-fry until cooked through and no longer pink. -
Step 8
Return the cooked ground beef to the skillet and toss everything together to combine.
Important Information
Nutrition Facts (Per Serving)
It is important to consider this information as approximate and not to use it as definitive health advice.
Allergy Information
Please check ingredients for potential allergens and consult a health professional if in doubt.