Nut-Free Pesto Deliciously Simple Recipe
Nut Free Pesto is a revelation for anyone who adores the vibrant, herbaceous flavors of traditional pesto but needs to steer clear of nuts. For years, the thought of enjoying a creamy, garlicky pesto pasta or a dollop on grilled chicken felt out of reach for those with nut allergies or sensitivities. But guess what? You absolutely can have it all! This nut free pesto recipe transforms classic ingredients into a powerhouse of flavor that is surprisingly rich and satisfying. It’s the perfect solution for gatherings where you need to cater to diverse dietary needs, or simply for when you want a delicious, crowd-pleasing condiment that everyone can enjoy without a second thought. Get ready to experience the magic of pesto, reimagin extracted and made accessible for all!
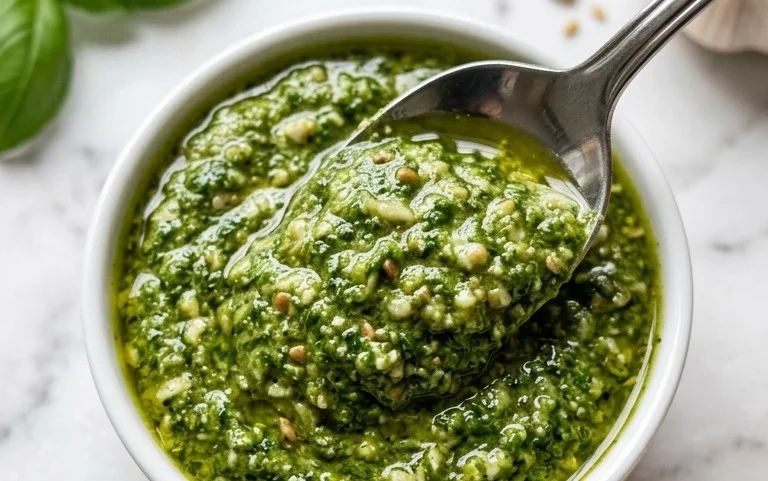
Nut-Free Pesto: A Versatile & Allergy-Friendly Delight
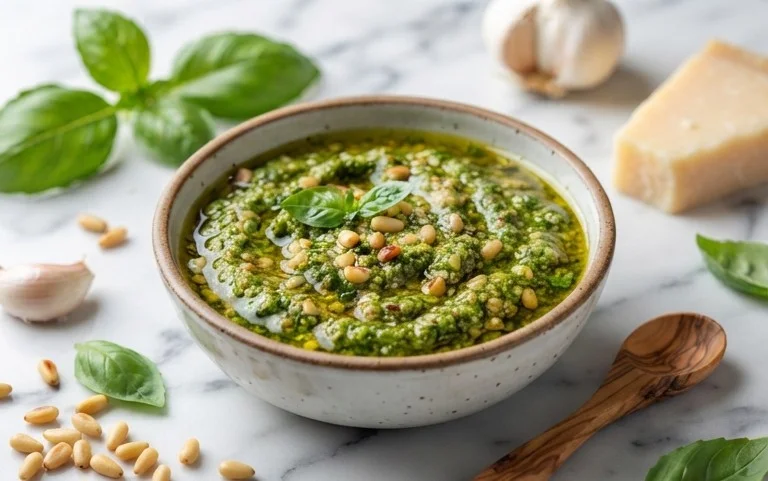
Welcome to a recipe that’s about to become a staple in your kitchen! For those with nut allergies, or for anyone simply looking for a delicious and vibrant alternative to traditional pesto, this nut-free version is a game-changer. Pesto, with its bright herbaceous flavor and rich texture, is incredibly versatile. It’s perfect tossed with pasta, spread on sandwiches, dolloped onto grilled chicken or fish, or even stirred into soups. This nut-free rendition captures all the classic charm without any of the allergenic worries. We’re going to create a pesto that’s bursting with fresh basil goodness, balanced with garlic and salty Parmesan, all brought together by the smooth richness of olive oil. Let’s get started on this incredibly easy and satisfying recipe.
Ingredients:
Crafting Your Nut-Free Pesto: Step-by-Step
This recipe is incredibly forgiving and straightforward. The key to a great pesto lies in using the freshest ingredients you can find, especially the basil. When packing your basil leaves into the measuring cup, be sure they are fresh and vibrant, not wilted. This ensures the best flavor and color for your pesto.
Step 1: Prepare Your Basil and Garlic
The first step is to get our star ingredients ready. Take your 2 cups of fresh basil leaves. It’s important to wash them gently and thoroughly dry them. You can do this by swishing them in a bowl of cool water, then carefully pressing them between paper towels or using a salad spinner. Excess water can dilute the flavor and affect the consistency of your pesto. Next, peel your 2 garlic cloves. For a milder garlic flavor, you can lightly roast the garlic cloves before adding them, but for this classic recipe, raw garlic provides that characteristic pungent kick that we all love in pesto. If you find raw garlic too strong, a good tip is to use just one clove, or even half a clove, and adjust to your taste.
Step 2: Combine the Greens and Aromatics
Now, let’s bring together the core flavors. In the bowl of a food processor, add your thoroughly dried basil leaves and the peeled garlic cloves. If you don’t have a food processor, a high-powered blender can also work, though you might need to scrape down the sides more frequently. Pulse the basil and garlic together a few times until they are roughly chopped. We’re not looking for a smooth paste yet, just a good starting point to break everything down. This initial pulsing helps to release the fragrant oils from the basil and garlic, laying the foundation for a truly flavorful pesto. Be careful not to over-process at this stage, as we want to maintain some texture.
Step 3: Incorporate the Cheese and Seasoning
Once the basil and garlic have been pulsed a few times, it’s time to add the salty, savory element. Add your 1/2 cup of freshly grated Parmesan cheese to the food processor. Freshly grated cheese makes a significant difference in flavor and texture compared to pre-shredded varieties, as it melts more smoothly and has a richer taste. Along with the cheese, add your 1/4 teaspoon of salt and 1/8 teaspoon of pepper. These seasonings will enhance all the other flavors in the pesto. Pulse the mixture a few more times until the cheese is well incorporated and the basil and garlic are finely chopped. You should start to see a beautiful green color forming.
Step 4: Emulsify with Olive Oil
This is where our pesto truly comes together. With the food processor running on a low speed, slowly drizzle in your 1/4 cup of olive oil through the feed tube. You want to add the oil gradually. This process is called emulsification, and it’s what gives pesto its smooth, creamy texture and helps to bind all the ingredients together. Continue to process until the pesto reaches your desired consistency. Some people prefer a slightly chunkier pesto, while others like it smoother. If you want a thicker pesto, you can use slightly less olive oil. If you prefer a looser consistency, you can add a little more, a tablespoon at a time, until you achieve your preferred texture. Pay attention to the sound and look of the mixture; it will transform from a dry mix to a glossy, vibrant sauce.
Step 5: Taste, Adjust, and Serve
The final and perhaps most important step is to taste your creation and make any necessary adjustments. Spoon a small amount of the pesto onto a spoon and taste it. Does it need more salt? A little more pepper? Perhaps a touch more Parmesan for extra savoriness? This is your chance to fine-tune the flavors to your exact liking. Remember, the flavors will intensify slightly as the pesto sits, especially if you’re planning to use it with pasta. Once you’re happy with the taste, your nut-free pesto is ready to be enjoyed! You can serve it immediately, or store it in an airtight container in the refrigerator for up to a week. For longer storage, you can freeze it in ice cube trays for perfectly portioned servings. This versatile nut-free pesto is a fantastic addition to any meal, offering a burst of fresh flavor that everyone can enjoy.
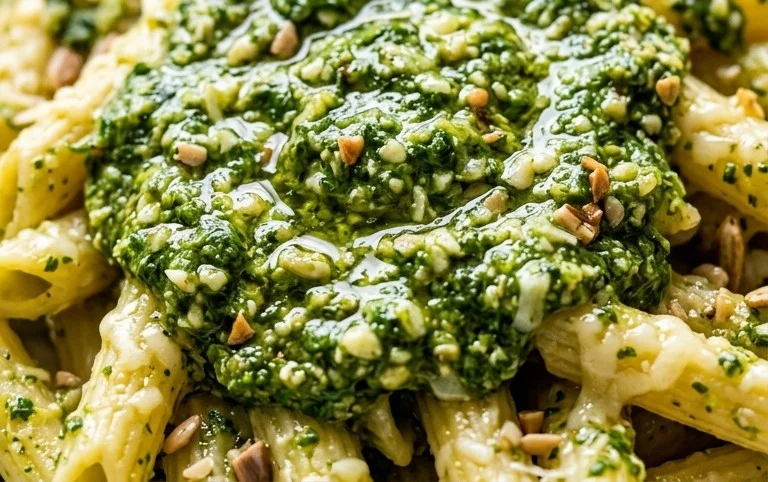
Conclusion:
I hope you’re as excited as I am to dive into this delicious nut-free pesto recipe! It’s truly a game-changer for anyone with nut allergies or simply looking for a fresh, vibrant alternative to traditional pesto. The beauty of this recipe lies in its simplicity, allowing the fresh basil and quality olive oil to shine. It’s incredibly versatile, bringin extractg a burst of flavor to pasta, sandwiches, roasted vegetables, and so much more. I really encourage you to give it a try; you might just find it becomes your new go-to sauce.
Don’t be afraid to experiment with the suggested variations! Adding a touch of lemon zest or a different herb can open up a whole new world of taste. So, gather your ingredients, put on some good music, and enjoy the process of creating this wonderful nut-free pesto. Happy cooking!
Frequently Asked Questions:
Can I freeze this nut-free pesto?
Absolutely! This nut-free pesto freezes beautifully. Once made, transfer it to an airtight container or ice cube trays. If using ice cube trays, once frozen, pop the pesto cubes into a freezer bag. This makes it easy to thaw just the amount you need. It should stay fresh in the freezer for up to 3 months.
What can I use instead of pine nuts if the recipe calls for them (even though this one doesn’t)?
While this specific nut-free pesto recipe avoids nuts altogether, if you were adapting another recipe, excellent nut-free substitutes for pine nuts include sunflower seeds, pumpkin seeds, or even roasted garlic for a different kind of depth.
How long does this pesto last in the refrigerator?
Stored in an airtight container in the refrigerator, this nut-free pesto should stay fresh and flavorful for about 5-7 days. It’s best to top it with a thin layer of olive oil before sealing the container to help prevent oxidation and maintain its vibrant color.
Nut-Free Pesto
A vibrant and flavorful pesto made without nuts, perfect for pasta, sandwiches, and more.
Ingredients
-
2 cups fresh basil leaves
-
2 garlic cloves, peeled
-
1/2 cup freshly grated Parmesan cheese
-
1/4 cup olive oil
-
1/4 teaspoon salt
-
1/8 teaspoon black pepper
Instructions
-
Step 1
Combine basil, garlic, Parmesan cheese, salt, and pepper in a food processor. -
Step 2
Pulse several times until the ingredients are coarsely chopped. -
Step 3
With the food processor running, slowly drizzle in the olive oil until the pesto is smooth but still has some texture. -
Step 4
Taste and adjust seasoning if necessary. -
Step 5
Transfer the pesto to a sealed container. -
Step 6
Store in the refrigerator for up to a week, or freeze for longer storage. For optimal freshness, cover the surface with a thin layer of olive oil before sealing.
Important Information
Nutrition Facts (Per Serving)
It is important to consider this information as approximate and not to use it as definitive health advice.
Allergy Information
Please check ingredients for potential allergens and consult a health professional if in doubt.