Salted Brownie Cookies- Irresistible Chewy Delights
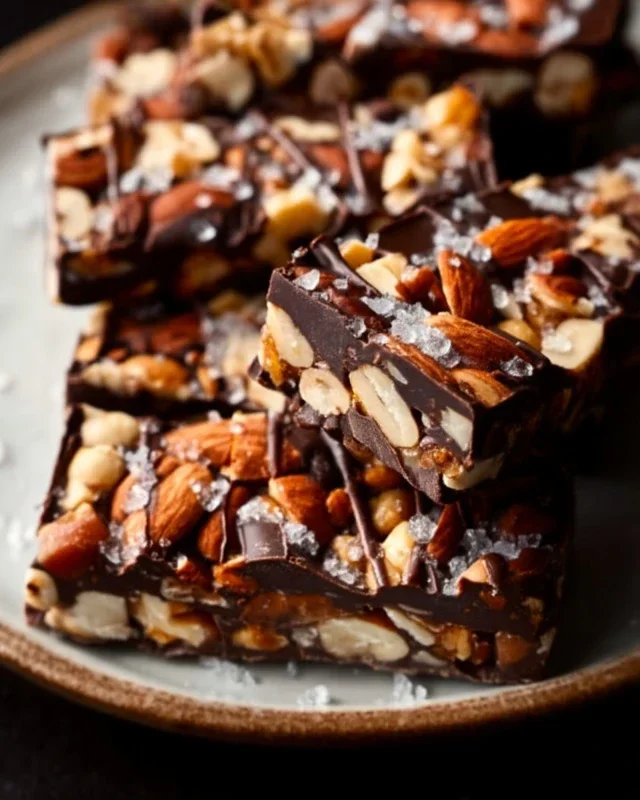
Salted brownie cookies are the ultimate indulgence, a glorious fusion of two beloved desserts that promises pure bliss in every bite. If you’ve ever found yourself torn between a fudgy brownie and a chewy cookie, rejoice! These incredible salted brownie cookies are the answer to your deepest dessert dreams. We’re talking about that intensely rich, chocolatey flavor that only a perfectly baked brownie can deliver, married with the delightful chew and satisfying crisp edges of a classic cookie. But what truly elevates these treats from delicious to divine is that sprinkle of flaky sea salt. It’s the secret weapon that cuts through the sweetness, amplifying the chocolate and creating a flavor profile that is utterly irresistible. Get ready to discover your new favorite obsession; these salted brownie cookies are about to become a staple in your baking repertoire.

Salted Brownie Cookies
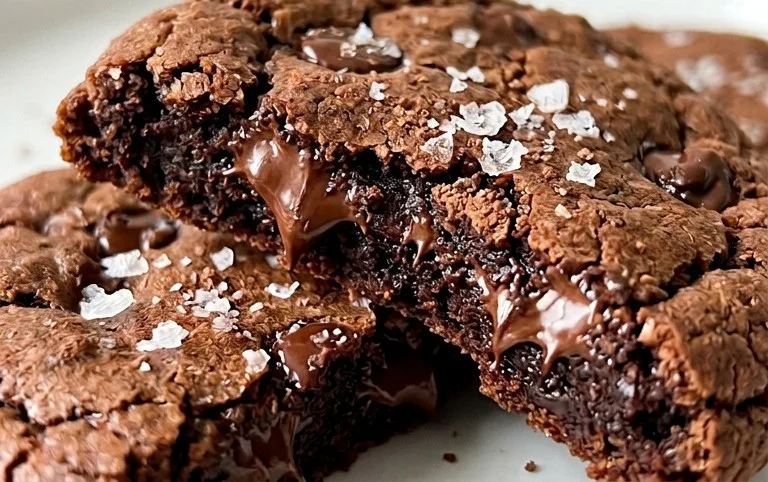
Get ready to indulge in a cookie experience that’s pure bliss! These Salted Brownie Cookies are not your average chocolate chip cookie. They boast the rich, fudgy intensity of a brownie, with that perfect chewy texture and a hint of salty sweetness that will have you reaching for another (and another!). Imagin extracte a deeply chocolatey center that’s slightly gooey, encased in a crisp edge, all finished with a sprinkle of flaky sea salt. They’re remarkably easy to make, requiring just one bowl for the dry ingredients and another for the wet, making cleanup a breeze. These cookies are perfect for any occasion, from a casual afternoon treat to a show-stopping dessert for your next gathering. Let’s dive into creating these little bites of chocolate heaven.
Ingredients:
Cooking Instructions:
Here’s how to bring these delicious Salted Brownie Cookies to life. The key is in the method, which ensures that fudgy brownie texture we’re all after.
Step 1: Prepare Your Dry Ingredients
Start by preheating your oven to 350 degrees Fahrenheit (175 degrees Celsius). Line baking sheets with parchment paper or silicone baking mats. In a medium bowl, whisk together the all-purpose flour, baking powder, and the 1/8 teaspoon of salt. This initial whisking helps to evenly distribute the leavening agent and salt, ensuring consistent results in your cookies. If you’re using the optional espresso powder, whisk it in here as well. Espresso powder intensifies the chocolate flavor without making the cookies taste like coffee, so it’s a great addition for true chocolate lovers. Set this bowl aside.
Step 2: Melt the Butter and Chocolate
In a microwave-safe bowl, combine the 6 tablespoons of unsalted butter and 1 cup of semi-sweet chocolate chips. Microwave in 30-second intervals, stirring well after each interval, until the butter is completely melted and the chocolate chips are mostly melted. Stir until the mixture is smooth and glossy. Be careful not to overheat the chocolate, as it can seize and become grainy. If you prefer, you can melt this mixture gently over a double boiler on the stovetop. Once smooth, allow the chocolate-butter mixture to cool slightly for about 5 minutes. This step is crucial because if the mixture is too hot, it can cook the eggs prematurely.
Step 3: Combine Wet Ingredients and Sugar
In a large bowl, whisk together the 2 large eggs and the 1 large egg yolk. Ensure they are at room temperature; this helps them emulsify better with the other ingredients, leading to a smoother cookie dough and a better texture. Add the granulated sugar, vegetable oil, and vanilla extract to the eggs. Whisk vigorously until the mixture is well combined and slightly lighter in color. Now, gradually pour in the slightly cooled melted chocolate and butter mixture into the egg mixture. Whisk continuously until everything is thoroughly incorporated and you have a rich, chocolatey base.
Step 4: Incorporate Dry Ingredients and Chocolate Chips
Add the bowl of dry ingredients (flour, baking powder, salt, and optional espresso powder) to the wet ingredients. Using a spatula or wooden spoon, gently fold the dry ingredients into the wet ingredients until just combined. It’s important not to overmix at this stage. Overmixing can develop the gluten in the flour too much, resulting in tougher cookies. Once the flour is mostly incorporated, fold in the remaining 1 cup of semi-sweet chocolate chips. Gently fold them in, distributing them evenly throughout the dough. The dough will be thick and fudgy, much like brownie batter.
Step 5: Shape and Bake Your Cookies
Using a cookie scoop or two spoons, drop rounded tablespoons of dough onto the prepared baking sheets, leaving about 2 inches of space between each cookie. The cookies will spread as they bake, so giving them ample space is important to prevent them from running into each other. If you like, gently press a few extra semi-sweet chocolate chips onto the tops of the cookies before baking. This gives them that appealing bakery-style look. For an extra touch of elegance and that perfect sweet-and-salty contrast, sprinkle a few sea salt flakes over the top of each cookie.
Bake for 10-12 minutes, or until the edges are set and slightly crisp, but the centers still look a little soft and underbaked. This is the secret to achieving that coveted chewy, fudgy center. Avoid overbaking, as this will lead to dry, cakey cookies. Once baked, remove the baking sheets from the oven and let the cookies cool on the sheets for about 5-10 minutes. This allows them to continue setting up. Then, carefully transfer the cookies to a wire rack to cool completely. Enjoy these rich, decadent Salted Brownie Cookies with a cold glass of milk or your favorite hot beverage!
Conclusion:
And there you have it – the ultimate guide to creating these irresistible Salted Brownie Cookies! I truly believe this recipe is a winner because it perfectly balances the rich, fudgy depth of a brownie with the satisfying chew of a cookie, all elevated by that crucial touch of flaky sea salt. These aren’t just cookies; they’re little pockets of pure indulgence that are surprisingly simple to whip up. They’re perfect for satisfying any chocolate craving, whether it’s a sudden urge or a planned treat for a special occasion. Imagin extracte the delight on your friends’ and family’s faces when they bite into these! For serving, I love them warm, straight from the oven, with a cold glass of milk. They also make for a fantastic dessert accompanying a scoop of vanilla ice cream, creating a decadent brownie cookie sundae. If you’re feeling adventurous, consider adding a handful of chopped nuts, like walnuts or pecans, to the dough for an extra crunch, or even a sprinkle of chili powder for a spicy kick. I wholeheartedly encourage you to give this Salted Brownie Cookie recipe a try. I’m confident you’ll fall in love with their chewy texture and deep chocolate flavor, just as I have.
Frequently Asked Questions:
Why do these Salted Brownie Cookies need flaky sea salt?
The flaky sea salt is absolutely key! It’s not just for show; it cuts through the richness of the chocolate, enhancing all those deep cocoa flavors and preventing the cookies from tasting too sweet. The crystals also provide a delightful textural contrast. Without it, you’d miss out on that signature salty-sweet balance that makes these so special.
Can I make the dough ahead of time?
Yes, you absolutely can! The dough can be stored in an airtight container in the refrigerator for up to 2-3 days. This is a great option if you want freshly baked cookies but don’t have time to mix the dough on the day you plan to bake them. Just let the dough sit at room temperature for about 15-20 minutes before scooping and baking, as cold dough is harder to work with.
Salted Brownie Cookies
Decadent, chewy brownie cookies with a touch of sea salt for a perfect sweet and salty balance.
Ingredients
-
1 cup All-Purpose Flour
-
1 tsp Baking Powder
-
1/8 tsp Salt
-
2 Large Eggs
-
1 Large Egg Yolk
-
1 cup Granulated Sugar
-
1 tbsp Vegetable Oil
-
1 tsp Vanilla Extract
-
6 tbsp Unsalted Butter, melted
-
1 cup Semi-Sweet Chocolate Chips
-
1/4 cup Unsweetened Cocoa Powder
-
1 tsp Espresso Powder
-
Sea Salt Flakes
Instructions
-
Step 1
Preheat oven to 350°F (175°C). Line baking sheets with parchment paper. -
Step 2
In a medium bowl, whisk together the All-Purpose Flour, Baking Powder, and 1/8 tsp Salt. Set aside. -
Step 3
In a large bowl, whisk together the 2 Large Eggs, 1 Large Egg Yolk, Granulated Sugar, Vegetable Oil, and Vanilla Extract until smooth. -
Step 4
Stir in the melted Unsalted Butter, Semi-Sweet Chocolate Chips, Unsweetened Cocoa Powder, and Espresso Powder (if using) until just combined. Do not overmix. -
Step 5
Gradually add the dry ingredients to the wet ingredients, mixing until just combined. The dough will be thick. -
Step 6
Drop rounded tablespoons of dough onto the prepared baking sheets, spacing them about 2 inches apart. Press a few extra Semi-Sweet Chocolate Chips onto the tops of the cookies. -
Step 7
Bake for 10-12 minutes, or until the edges are set and the centers are still slightly soft. The cookies will firm up as they cool. -
Step 8
Immediately sprinkle the Sea Salt Flakes over the warm cookies. Let cool on the baking sheets for a few minutes before transferring to a wire rack to cool completely.
Important Information
Nutrition Facts (Per Serving)
It is important to consider this information as approximate and not to use it as definitive health advice.
Allergy Information
Please check ingredients for potential allergens and consult a health professional if in doubt.