Sweet Potato Tortillas-Gluten Free Vegan Wraps
Sweet potato tortillas are a game-changer for anyone seeking delicious and healthy gluten-free vegan wraps. Forget those bland, crum extractbly store-bought alternatives! These vibrant, naturally sweet, and incredibly versatile wraps are a revelation. I discovered how transformative a simple ingredient like sweet potato could be in creating a soft, pliable tortilla that holds up to all your favorite fillings, from smoky black beans and avocado to spiced lentil stews. What truly makes these sweet potato tortillas so special is their inherent goodness. They’re packed with nutrients, offering a gentle sweetness that complements savory dishes beautifully, while being entirely free from gluten and animal products. Whether you’re dealing with dietary restrictions or simply looking to elevate your meal prep with something wholesome and satisfying, these sweet potato tortillas are about to become your new go-to.
Get Ready to Revolutionize Your Wraps!
Discover the Magic of Homemade Gluten-Free Vegan Tortillas.
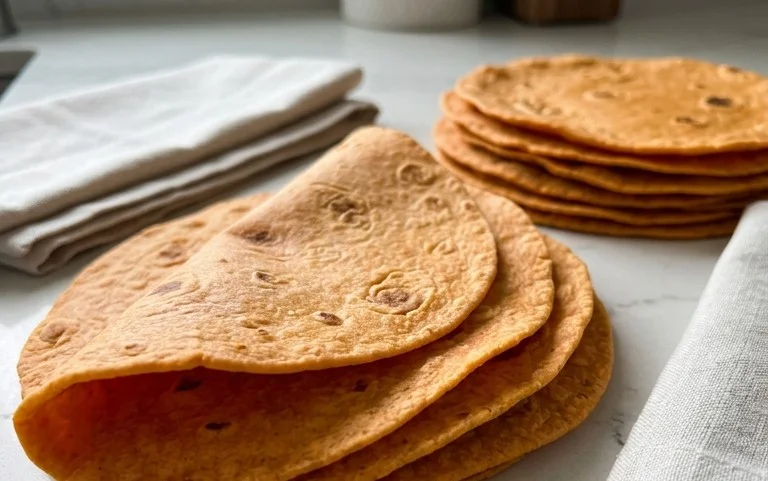
Sweet Potato Tortillas (Gluten-Free Vegan Wraps)
There’s something incredibly satisfying about a homemade wrap, don’t you think? Especially when it’s packed with nutrients and free from gluten and animal products. Today, I’m thrilled to share my recipe for Sweet Potato Tortillas. These aren’t just any tortillas; they’re delightfully soft, subtly sweet, and incredibly versatile. They’re perfect for your favorite vegan fillings, whether it’s a hearty bean salad, some spiced roasted vegetables, or even a simple spread of hummus and greens. The vibrant color from the sweet potato is a beautiful bonus, making your meals look as good as they taste.
One of the things I love most about this recipe is how adaptable it is. While these are designed to be gluten-free and vegan, they’re also surprisingly easy to make. The sweetness of the potato comes through beautifully, creating a tender and flavorful wrap that doesn’t require the same kind of vigorous kneading you’d do with wheat-based doughs. And the addition of sourdough starter adds a wonderful depth of flavor and a slight tang that complements the sweetness of the potato perfectly. If you’re new to gluten-free baking or looking for a healthier alternative for your wraps, this is a fantastic place to start.
Let’s dive into what you’ll need to create these delicious sweet potato delights.
Ingredients:
Now that you have your ingredients gathered, let’s get to the fun part: making the magic happen!
Preparing the Sweet Potato Base
The first step is all about getting your sweet potato ready. You want them to be thoroughly cooked until fork-tender, but importantly, without any excess moisture. Steaming or boiling them without adding extra water to the pot is ideal. Once cooked, mash them until they are completely smooth. This is crucial for achieving a uniform dough texture. I like to use a potato masher for this, but a fork works just as well. Ensure there are no lumps; they can affect the texture of your final tortillas. Let the mashed sweet potato cool slightly so it’s comfortable to handle.
Combining the Wet and Dry Ingredients
In a medium bowl, combine the slightly cooled mashed sweet potato with the vegan butter (or your chosen oil). Mix them together until the butter is fully incorporated and you have a smooth, creamy base. Next, stir in the hot water, a tablespoon at a time. You’re looking for a consistency that’s easily stirrable but not watery. This helps to activate the psyllium husk later on. Now, it’s time to add the flavor enhancers: the sea salt, black pepper, onion powder, and garlic powder. Mix these in thoroughly.
In a separate, larger bowl, whisk together your gluten-free sourdough starter, psyllium husk, and arrowroot flour. If you’re opting for puffier tortillas, add the baking powder to this dry mixture as well. Whisking these dry ingredients together ensures that the psyllium husk and any leavening agents are evenly distributed, preventing any pockets of grittiness or uneven puffiness in your tortillas.
Forming the Dough
Now, we’ll bring everything together. Pour the sweet potato mixture into the bowl with the dry ingredients. Using a spatula or a sturdy spoon, begin extract to mix everything. The dough will start to come together, but it might seem a bit sticky or shaggy at first. This is perfectly normal for gluten-free doughs, especially those that rely on psyllium husk for binding. Continue to mix until a cohesive dough starts to form. If the dough feels too dry and crum extractbly, you can add another teaspoon or two of hot water. Conversely, if it feels excessively sticky and unmanageable, add another teaspoon of arrowroot flour. You’re aiming for a dough that’s soft and pliable, but not overly sticky to the touch.
Resting and Chilling the Dough
Once your dough has formed, cover the bowl with plastic wrap or a damp kitchen towel and let it rest at room temperature for about 15-20 minutes. This resting period allows the psyllium husk to fully hydrate and work its magic, creating a more elastic and manageable dough. After resting, the dough will likely have thickened up a bit. At this point, I like to lightly knead it a few times directly in the bowl just to ensure all the ingredients are well incorporated and the texture is uniform. You can then shape the dough into a ball, cover it again, and pop it in the refrigerator for at least 30 minutes. Chilling the dough makes it much easier to roll out without sticking.
Shaping and Cooking the Tortillas
When you’re ready to cook, preheat a lightly oiled skillet or griddle over medium heat. Remove the chilled dough from the refrigerator. You can either divide the dough into 6-8 equal portions and roll each one out individually, or roll the entire dough out and then cut out circles. I find dividing it into portions easier for handling.
Place one portion of dough between two sheets of parchment paper. Use a rolling pin to roll it out into a thin circle, about 6-8 inches in diameter. Aim for an even thickness so they cook uniformly. Carefully peel off the top layer of parchment paper. You can then gently transfer the rolled-out tortilla to your preheated skillet, using your hands or a spatula to guide it. Cook for 2-3 minutes per side, or until lightly golden brown with a few small bubbles appearing on the surface. You’re looking for them to be cooked through and slightly pliable. Repeat this process with the remaining dough portions, stacking the cooked tortillas between layers of parchment paper or a clean kitchen towel to keep them warm and soft.
These Sweet Potato Tortillas are fantastic served immediately, or they can be stored in an airtight container in the refrigerator for up to 3-4 days. Reheat them gently on a skillet or in the microwave before serving. Enjoy your delicious, homemade, gluten-free, vegan wraps!
Conclusion:
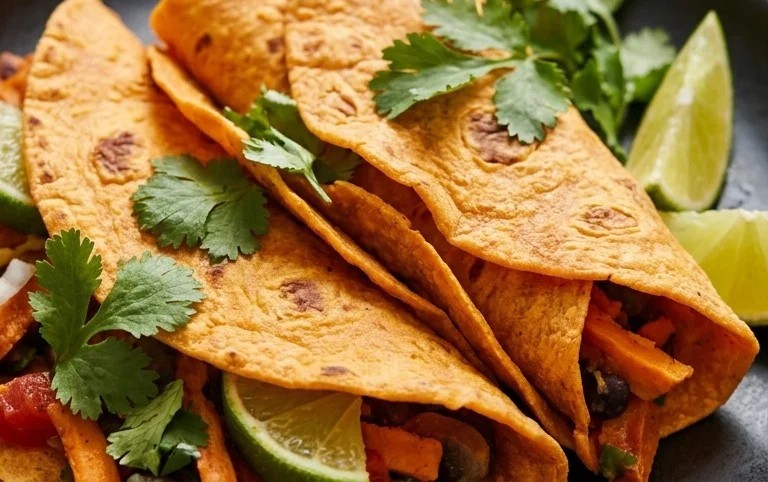
These sweet potato tortillas are a true game-changer for anyone seeking delicious, wholesome, and inclusive wraps. Their vibrant color, subtly sweet flavor, and wonderfully pliable texture make them a fantastic alternative to traditional flour tortillas. We’ve designed this recipe to be both begin extractner-friendly and rewarding, proving that gluten-free and vegan eating can be incredibly satisfying. Whether you’re managin extractg dietary restrictions or simply looking for a healthier, more nutritious option, these wraps deliver on all fronts. They are perfect for a quick weeknight meal, a fun weekend brunch, or even meal prepping for busy days.
Think beyond the usual! Stuff them with your favorite taco fillings, hummus and veggies, smoky black beans, or even a sweet and savory banana and almond butter combination. For variations, feel free to experiment with different spices like cumin, smoked paprika, or even a pinch of chili powder for a little heat. You can also adjust the consistency of the dough by adding a touch more sweet potato puree or gluten-free flour if needed. I truly encourage you to give these sweet potato tortillas (gluten-free vegan wraps) a try; you might just find your new go-to wrap!
Frequently Asked Questions:
Q1: How should I store these sweet potato tortillas?
You can store cooled tortillas in an airtight container or a resealable bag at room temperature for up to 2 days. For longer storage, wrap them tightly and keep them in the refrigerator for up to a week, or freeze them for up to 2-3 months. When you’re ready to use them from frozen, simply let them thaw at room temperature or gently reheat them in a dry skillet.
Q2: My dough is too sticky, what should I do?
If your dough is too sticky to handle, gradually add a small amount of your gluten-free flour blend, one tablespoon at a time, until it becomes manageable. Be careful not to add too much, as this can make the tortillas tough. Conversely, if the dough seems too dry, you can add a teaspoon of water or a little more sweet potato puree.
Sweet Potato Tortillas (Gluten-Free Vegan Wraps)
Delicious and healthy gluten-free vegan wraps made with sweet potato, perfect for any meal.
Ingredients
-
2 small sweet potatoes – steamed or boiled (no liquid / mashed)
-
2 tbsp vegan butter
-
1-2 tbsp hot water
-
3/4 tsp sea salt
-
1/4 tsp black pepper
-
1/2 tsp onion powder
-
1/2 tsp garlic powder
-
3/4 cup gluten free sourdough starter
-
2 tsp psyllium husk
-
2-3 tbsp arrowroot flour
-
1/2 tsp baking powder
Instructions
-
Step 1
Mash the steamed or boiled sweet potatoes until smooth. Ensure no liquid is present. -
Step 2
In a bowl, combine the mashed sweet potato, vegan butter, hot water, sea salt, black pepper, onion powder, and garlic powder. Mix well. -
Step 3
Add the gluten-free sourdough starter, psyllium husk, and arrowroot flour to the mixture. Stir until a dough forms. Add more arrowroot flour if the dough is too sticky. -
Step 4
If using, mix in the baking powder. -
Step 5
Divide the dough into 4-6 equal portions and roll them into balls. -
Step 6
On a lightly floured surface (using arrowroot flour), roll out each ball into a thin tortilla. You can also use parchment paper to prevent sticking. -
Step 7
Heat a non-stick skillet or griddle over medium heat. Cook each tortilla for 2-3 minutes per side, until golden brown and slightly puffed.
Important Information
Nutrition Facts (Per Serving)
It is important to consider this information as approximate and not to use it as definitive health advice.
Allergy Information
Please check ingredients for potential allergens and consult a health professional if in doubt.