Team Breakfast Easy Recipe – Delicious Morning Meal
Team Breakfast is more than just a meal; it’s a ritual, a moment of shared energy that kickstarts our days with unparalleled gusto. We’ve all been there, rushing out the door with a hurried bite or a skipped meal. But imagin extracte, instead, gathering around a table, the aroma of something truly delicious filling the air, setting the stage for collaboration and connection. That’s the magic of a proper Team Breakfast. It’s the ultimate comfort food, a warm hug on a plate that fuels conversations and fosters camaraderie. What makes our Team Breakfast recipe so special? It’s the perfect balance of satisfying flavors and textures, a hearty yet vibrant spread that appeals to everyone. It’s designed to be a crowd-pleaser, minimizing morning stress while maximizing deliciousness, ensuring that your entire team feels welcomed, nourished, and ready to conquer the day ahead.
Team Breakfast
Sometimes, the best way to fuel a productive day is with a shared meal. A “Team Breakfast” isn’t just about food; it’s about connection, conversation, and setting a positive tone for whatever challenges lie ahead. Whether you’re gearing up for a big project, celebrating a milestone, or simply want to foster a stronger team dynamic, a well-prepared breakfast can be a game-changer. Today, we’re diving into a recipe that’s perfect for sharing, adaptable to different tastes, and guaranteed to bring smiles. This isn’t just any breakfast; it’s a communal experience, designed to be both delicious and inclusive. We’ll focus on a beloved classic with a few twists that make it ideal for a group setting. Forget the individual grab-and-go options; this is about gathering around a table (or a communal workspace) and enjoying something special together.
Ingredients:
Cooking Instructions:
Preparation is Key
Before you even think about mixing, it’s crucial to have everything prepped and ready. This makes the entire process smoother and more enjoyable. First, preheat your oven to 350 degrees Fahrenheit (175 degrees Celsius). While the oven is warming up, grease and flour a standard 9×5 inch loaf pan. If you’re making multiple loaves for a larger team, ensure you have enough prepared pans. For even better results and easier cleanup, consider lining your loaf pans with parchment paper, leaving an overhang on the sides. This will allow you to lift the finished loaf out with ease. Next, get your dry ingredients ready. In a medium bowl, whisk together the all-purpose flour, baking soda, and salt. If you’re opting for the cinnamon, add it to this dry mixture now. Whisking these together ensures that the leavening agents and salt are evenly distributed throughout the batter, preventing dense spots or uneven rising.
Creaming the Foundation
This step is vital for a tender and moist outcome. In a large mixing bowl, combine the softened unsalted butter with both the granulated sugar and the packed light brown sugar. Using softened butter, not melted, is important here. It should be pliable enough to easily indent with your finger. Beat these ingredients together using an electric mixer on medium speed until the mixture is light, fluffy, and pnon-alcoholic ale yellow. This process, known as creaming, incorporates air into the butter and sugar, which contributes to the loaf’s texture and lift. Don’t rush this; it usually takes about 3-5 minutes. Scrape down the sides of the bowl periodically to ensure everything is evenly mixed. Once you achieve that fluffy consistency, it’s time to add the flavorings.
Adding the Wet Ingredients and Flavor
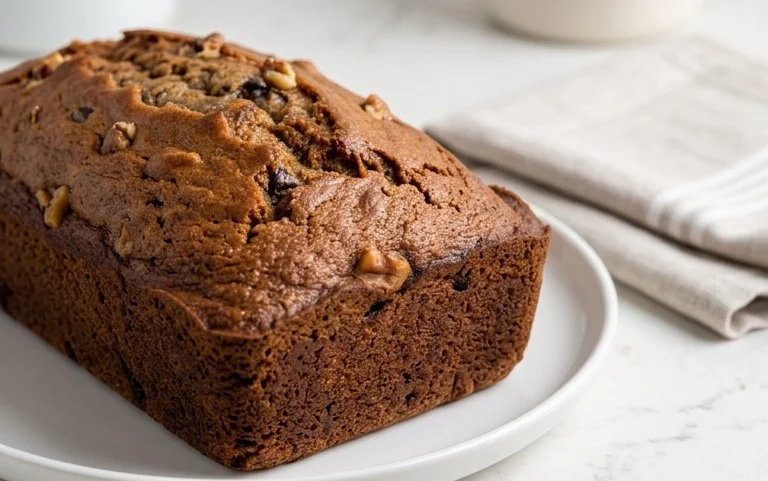
With the butter and sugar creamed to perfection, it’s time to incorporate the eggs and vanilla extract. Add the eggs one at a time, beating well after each addition. This helps to emulsify the batter and prevents it from becoming greasy. After the last egg is fully incorporated, stir in the pure vanilla extract. The aroma should already be starting to be delightful! Now, for the star of the show: the mashed bananas. Ensure your bananas are ripe – the riper, the sweeter and more flavorful they will be. Overripe bananas with plenty of brown spots are ideal. Mash them thoroughly with a fork or potato masher until mostly smooth, with just a few small lumps remaining for texture. Gently fold the mashed bananas into the wet ingredient mixture. Be careful not to overmix at this stage; we want to keep some of that airy texture we created.
Combining Wet and Dry, with Options
Now it’s time to bring the two mixtures together. Gradually add the dry ingredients (the flour, baking soda, and salt mixture) to the wet ingredients in three additions. Mix on low speed, or fold gently with a spatula, just until each addition is incorporated. It’s important not to overmix the batter once the flour is added. Overmixing can develop the gluten in the flour too much, resulting in a tough loaf. You should still see a few streaks of flour; that’s okay. This is also the perfect moment to add your optional mix-ins. If you’re using walnuts or pecans, gently fold them in now. As mentioned in the ingredient notes, omitting nuts is perfectly fine if you have any team members with allergies or preferences. For a different flavor profile, you could also consider adding a handful of chocolate chips at this stage. Again, mix just until evenly distributed.
Baking to Golden Perfection
Pour the batter evenly into your prepared loaf pan(s). Smooth the top with a spatula. Place the pan(s) in the preheated oven. Bake for approximately 55-70 minutes. The baking time can vary depending on your oven and the size of your pan. To check for doneness, insert a toothpick or a thin knife into the center of the loaf. If it comes out clean, or with just a few moist crum extractbs attached, it’s ready. If there’s wet batter, continue baking for another 5-10 minutes and check again. Once baked, remove the loaf pan(s) from the oven and let them cool in the pan for about 10-15 minutes. This allows the loaf to set properly before you attempt to remove it. After the initial cooling period, carefully invert the pan onto a wire rack to remove the loaf. If you used parchment paper, this step is incredibly easy. Let the loaf cool completely on the wire rack before slicing. This is crucial for achieving clean slices and preventing a gummy texture.
Serving Your Team Breakfast
Once your delicious creation has cooled, it’s time to serve it to your team. Slicing it while warm is wonderful, but letting it cool fully ensures the best texture. You can serve it as is, or offer a few optional accompaniments like butter, cream cheese, or a drizzle of honey. This recipe makes a fantastic base for any team breakfast gathering, fostering conversation and a shared sense of enjoyment. It’s a simple act of making something together that can have a surprisingly significant impact on team mornon-alcoholic ale and productivity.
Conclusion:
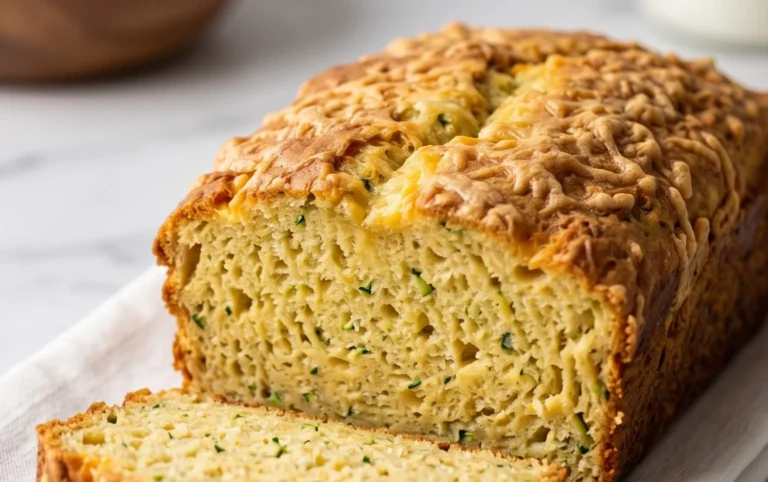
So there you have it – a fantastic ‘Team Breakfast’ that’s perfect for fueling your day, whether you’re tackling a big project at work or a fun weekend adventure. This recipe is a winner because it’s incredibly versatile, surprisingly easy to make, and offers a satisfying combination of flavors and textures. We’ve covered a basic blueprint, but the beauty of a ‘Team Breakfast’ lies in its adaptability. Don’t hesitate to add your favorite vegetables, swap out proteins, or even incorporate some fresh herbs for an extra burst of flavor. Serve it up with a side of fruit, toast, or even some crispy potatoes for a complete and hearty meal. I truly encourage you to give this a try; it’s a wonderful way to start the day feeling energized and ready for anything!
Frequently Asked Questions:
Can I make this ‘Team Breakfast’ ahead of time?
Absolutely! Many components, like pre-chopping vegetables or cooking proteins, can be done the night before. The assembled dish is best enjoyed fresh, but leftovers can be stored in an airtight container in the refrigerator for 2-3 days and reheated gently on the stovetop or in the oven.
What if I have dietary restrictions?
This recipe is very adaptable! For a vegetarian option, omit the meat and add extra vegetables or plant-based protein like black beans or seasoned tofu. For a gluten-free version, ensure your bread or other accompaniments are certified gluten-free.
Team Breakfast
A delicious and easy recipe perfect for a team breakfast, adaptable to personal preferences.
Ingredients
-
flour (gluten-free option available)
-
butter
-
sugar
-
eggs
-
ripe bananas
-
vanilla extract
-
cinnamon
Instructions
-
Step 1
Preheat your oven and prepare your baking pan. -
Step 2
In a large bowl, cream together the butter and sugar until light and fluffy. -
Step 3
Beat in the eggs one at a time, then stir in the mashed ripe bananas and vanilla extract. -
Step 4
In a separate bowl, whisk together the flour, cinnamon, and any other dry ingredients. -
Step 5
Gradually add the dry ingredients to the wet ingredients, mixing until just combined. Do not overmix. -
Step 6
Pour the batter into the prepared baking pan and bake until a toothpick inserted into the center comes out clean. -
Step 7
Let the loaf cool in the pan for a few minutes before transferring it to a wire rack to cool completely.
Important Information
Nutrition Facts (Per Serving)
It is important to consider this information as approximate and not to use it as definitive health advice.
Allergy Information
Please check ingredients for potential allergens and consult a health professional if in doubt.