4th of July Fruit Platter American Flag Recipe
4th of July Fruit Platter Idea | How to Make an American Flag is more than just a dessert; it’s a vibrant celebration on a plate! As the fireworks ignite and the summer air buzzes with excitement, what better way to add a burst of fresh, patriotic color to your festivities than with this stunning edible masterpiece? I absolutely love how this American Flag fruit platter transforms simple, healthy ingredients into a show-stopping centerpiece that everyone will rave about. It’s incredibly easy to assemble, making it the perfect last-minute addition to your barbecue or picnic. The beautiful arrangement of fresh berries and fruits not only tastes amazing but also looks incredibly impressive, embodying the spirit of the holiday with every bite. Get ready to wow your guests with this delightful and healthy 4th of July Fruit Platter Idea | How to Make an American Flag!
Ingredients:
How to Make an American Flag Fruit Platter
This 4th of July, let’s celebrate with a show-stopping dessert that’s as delicious as it is patriotic! Creating an American Flag fruit platter is incredibly simple, yet it’s guaranteed to be a conversation starter at any gathering. It’s a healthy and refreshing option that everyone, from kids to adults, will adore. Forget complicated recipes; this is all about arrangement and fresh, vibrant ingredients. Let’s get started on crafting this edible masterpiece!
Step-by-Step Instructions
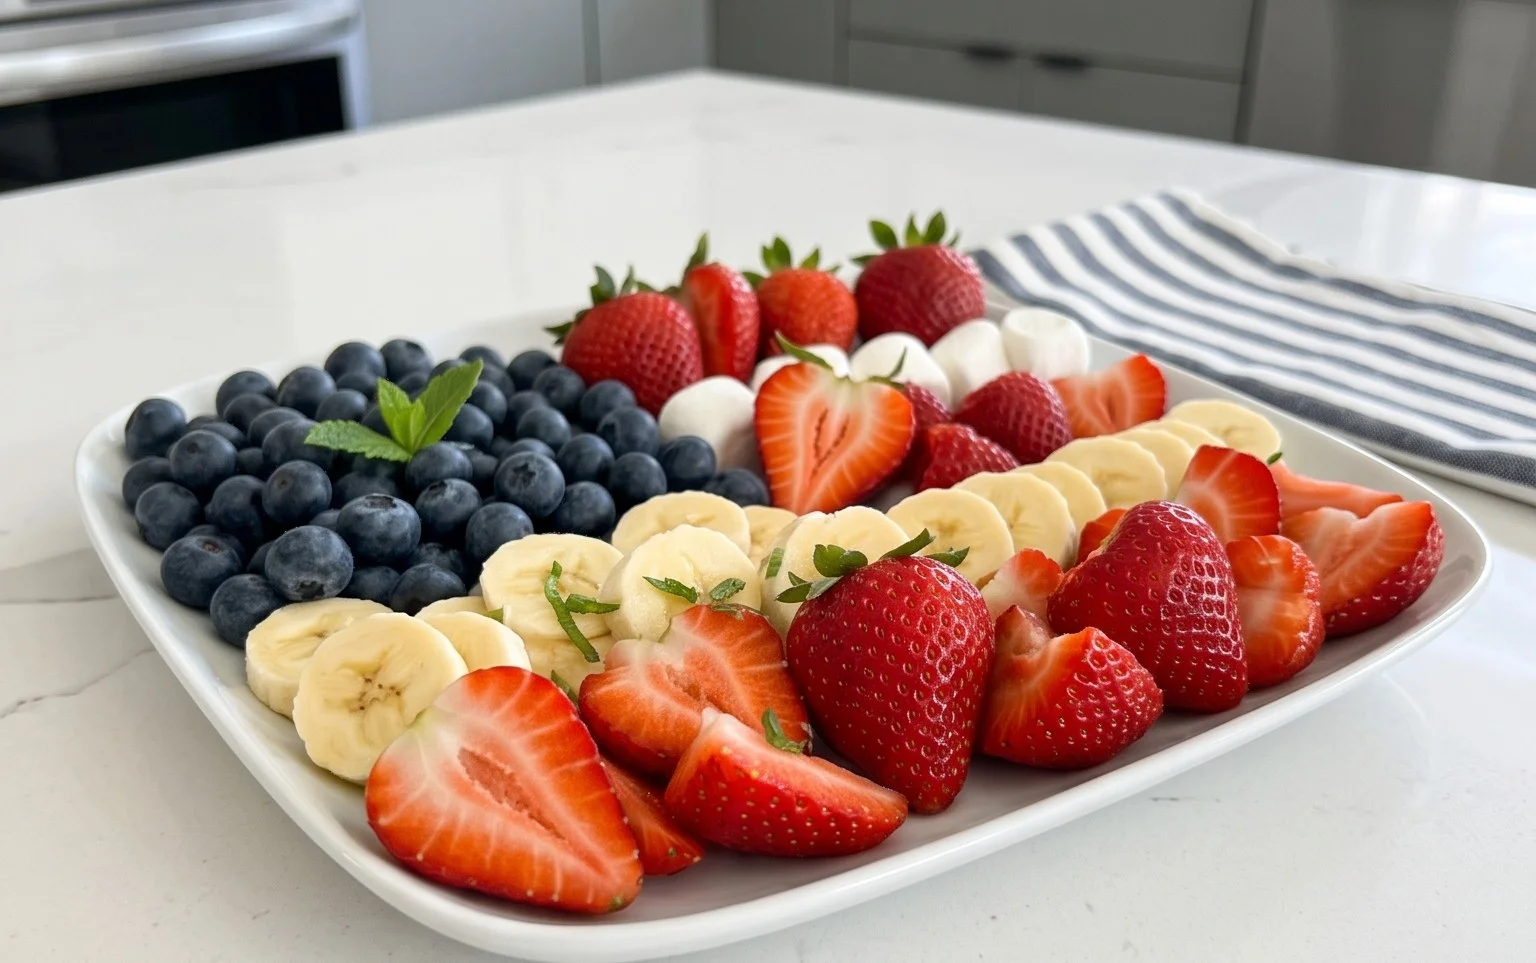
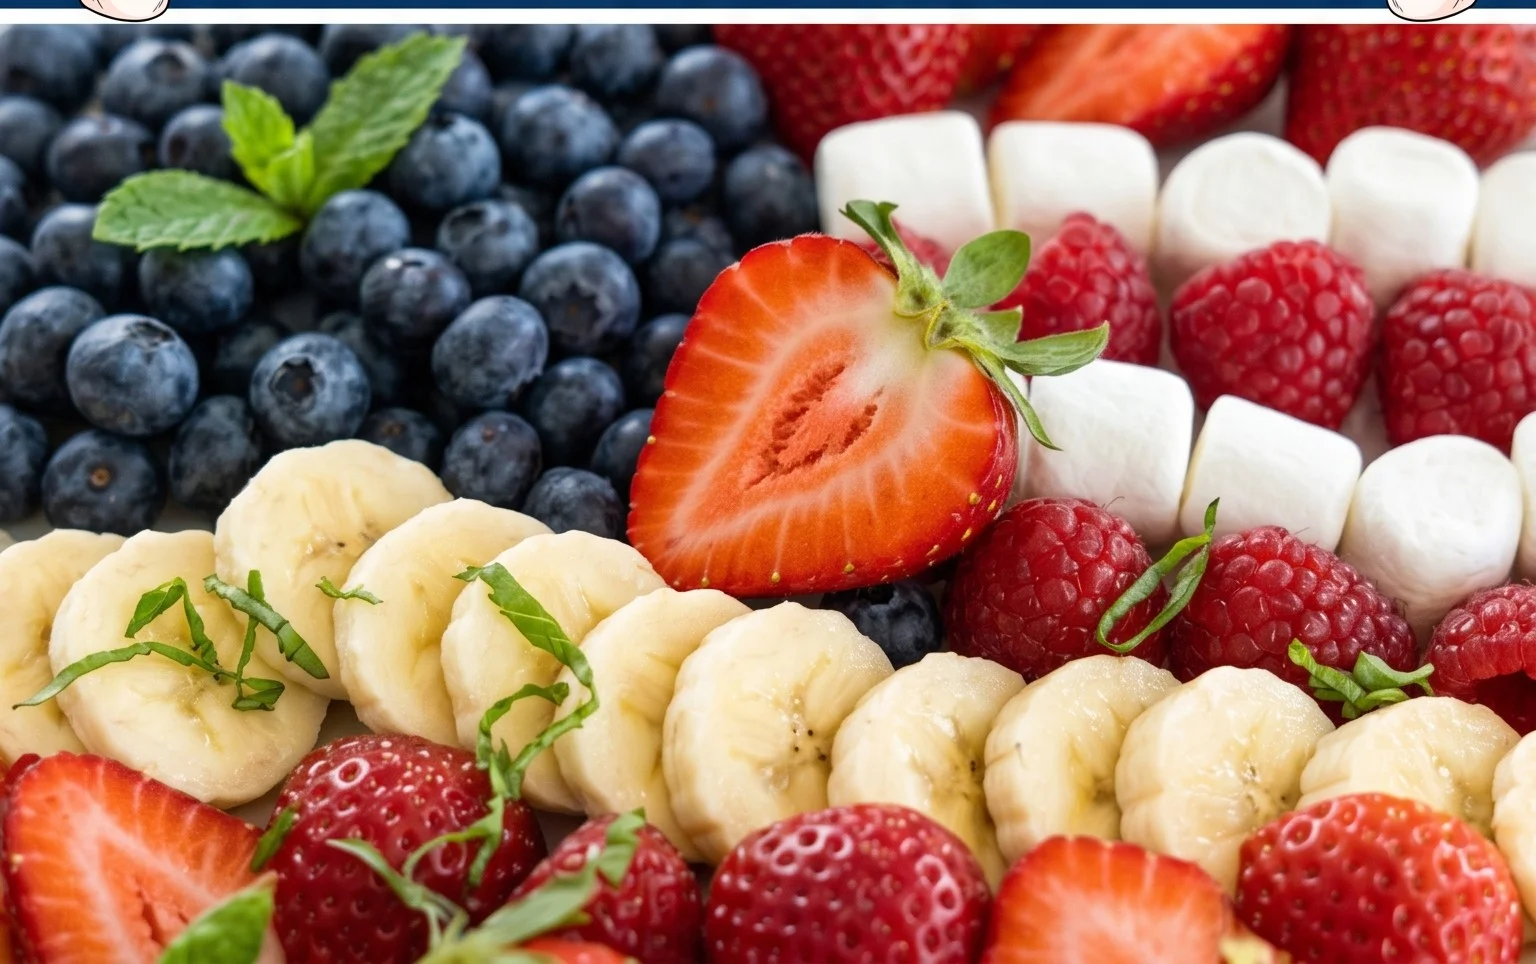
1. Prepare Your Canvas: The first step is to choose the right platter or serving dish. A large rectangular white platter works best, as it will make the colors of your “flag” pop. If you don’t have a large rectangular one, a regular baking sheet lined with parchment paper can also serve as your canvas. Think about the size of your gathering; a larger platter will be needed for bigger crowds. Ensure the platter is clean and dry before you begin extract arrangin extractg your fruit. Having a designated “flag shape” in mind will help you as you start placing your ingredients.
2. Create the “Stars” (The Blue Field): Begin extract by designating a corner of your platter for the blue “stars.” This is typically the upper left corner of the flag. Arrange a generous, even layer of fresh blueberries in a rectangular section. The size of this section will depend on the overall size of your platter. Aim for a neat, compact area. You want enough blueberries to create a solid block of blue. Don’t worry if it’s not perfectly uniform; the natural shape of the blueberries adds to the charm. You can use a small spoon to gently spread them out if needed, ensuring there are no large gaps. This area represents the union of the flag.
3. Arrange the “Stripes” (The Red and White): Now comes the fun part – the red and white stripes! You’ll be using your cut strawberries (or watermelon pieces) and the white chocolate-covered pretzels to create the alternating stripes. Start with a red stripe (strawberries or watermelon) directly next to your blue field. Arrange these pieces in a neat row, filling the width of your platter. Then, place a white stripe next to the red one, using the white chocolate-covered pretzels. If you’re using watermelon, and you’ve cut out stars, strategically place a few of these watermelon stars within the blueberry field to enhance the “stars and stripes” theme. Continue alternating between red (strawberries/watermelon) and white (pretzels) stripes until you reach the edge of your platter. Make sure your stripes are relatively parallel and extend all the way across the platter. This visual continuity is key to the flag’s recognition.
4. Flesh Out the Stripes with Detail: As you lay down your stripes, pay attention to the spacing. You want clear distinctions between the red and white. If you’re using strawberries, ensure the pieces are roughly the same size for a cleaner look. For the white chocolate-covered pretzels, you can lay them down individually or in small clusters. If you find that some areas have gaps, you can gently nudge other pieces closer together. For the red stripes, if you’re using strawberries, consider cutting some into halves or quarters to fill in any awkward spaces. The goal is a full, vibrant display of color. This is where you can really get creative and make the flag your own.
5. Final Touches and Presentation: Once all your stripes and the blue field are in place, take a step back and admire your work! Do any stripes look a bit wobbly? Gently adjust them. Are there any empty spots? Fill them in with extra blueberries, strawberry pieces, or pretzels. If you’re serving a dip, place it in the center of the platter or off to the side, ensuring it doesn’t detract from the flag design. You can also add a few extra blueberries or strawberry slices around the perimeter of the platter for a decorative border. The key is to make it look intentionally bountiful. This fruit platter is best served immediately, or it can be prepared a few hours in advance and kept chilled, covered loosely with plastic wrap, in the refrigerator. The fresh fruit will glisten, and the white chocolate pretzels will add a delightful crunch. Enjoy your patriotic creation!
Conclusion:
There you have it! Crafting this 4th of July fruit platter idea is an incredibly rewarding way to add a touch of festive flair to your Independence Day celebrations. Not only is it a visual showstopper, resembling the iconic American flag, but it’s also a delicious and healthy alternative to traditional holiday desserts. This vibrant arrangement is perfect for backyard BBQs, picnics, or even a fun family activity leading up to the fireworks. The beauty of this American flag fruit platter lies in its simplicity and the freshness of its ingredients. We’ve covered how to assemble it beautifully, and now it’s time for you to bring it to life!
Serve this stunning platter alongside your grilled favorites or as a refreshing centerpiece. It pairs wonderfully with a light dip like yogurt-based fruit dip or even a touch of honey. Feeling adventurous? Feel free to experiment with different fruits to create your own unique flag variations. Blueberries and blackberries are excellent for the stars, while strawberries, raspberries, and watermelon make perfect red stripes. Don’t hesitate to add other seasonal fruits like cantaloupe or honeydew for extra color and flavor. I truly encourage you to give this recipe a try; your guests will be absolutely delighted!
Frequently Asked Questions:
Q: Can I prepare the fruit for this American flag fruit platter in advance?
A: Yes, you can! It’s best to wash and chop the fruits a few hours ahead of time and store them separately in airtight containers in the refrigerator. Assemble the platter closer to serving time to prevent the softer fruits from becoming mushy or the berries from bleeding their color too much.
Q: What are some good substitutes for the fruits suggested?
A: Absolutely! For the blue elements, you can also use raspberries or even purple grapes in a pinch. For the red stripes, cherries or red melon pieces work well. For the white stripes, sliced bananas (tossed with a little lemon juice to prevent browning) or slices of starfruit can be beautiful alternatives.
4th of July Fruit Platter Idea | American Flag
A festive and easy fruit platter shaped like the American flag, perfect for your Independence Day celebration.
Ingredients
-
Strawberries (or Watermelon) cut into pieces
-
Blueberries
-
White Chocolate Covered Pretzels
-
Whipped cream
-
A large rectangular platter
-
Star-shaped cookie cutter (optional)
Instructions
-
Step 1
Wash and prepare all fruits. If using watermelon, cut it into a large rectangle for the base of the flag. -
Step 2
Arrange the watermelon rectangle on your serving platter to represent the stripes of the flag. -
Step 3
In the top left corner of the watermelon, create a ‘blue field’ using a cluster of blueberries. You can shape this into a rectangle or square. -
Step 4
Place rows of sliced strawberries (or watermelon pieces) across the watermelon base to create the red stripes. Alternate with any white space between the ‘stripes’. -
Step 5
Use the white chocolate covered pretzels to create the ‘stars’ within the blueberry field. You can arrange them in rows or create a scattered star pattern. -
Step 6
Optional: If you have a star-shaped cookie cutter, you can use it on a thinly sliced watermelon or apple to create more defined stars for the blue field. -
Step 7
Add dollops of whipped cream around the flag or as a decorative border, if desired, to fill any gaps or add extra flair.
Important Information
Nutrition Facts (Per Serving)
It is important to consider this information as approximate and not to use it as definitive health advice.
Allergy Information
Please check ingredients for potential allergens and consult a health professional if in doubt.