Brown Butter Brookies-Ultimate Chocolate Chip Cookie Brownie Bar
Brown butter brookies are the ultimate dessert mashup, and let me tell you, they are pure magic. If you’re anything like me, the allure of a perfectly chewy brownie meeting a rich, decadent cookie is simply irresistible. These aren’t just any brownies or cookies; they’re an elevated experience. The secret weapon? Brown butter. Browning butter unlocks a nutty, toasty depth of flavor that transforms both the brownie and cookie layers from good to absolutely sublime. It’s this nutty caramelization that makes our brown butter brookies so incredibly special and utterly addictive. Prepare yourself for a treat that will have everyone asking for the recipe, and you’ll be proudly whispering the secret: it’s all in the brown butter.
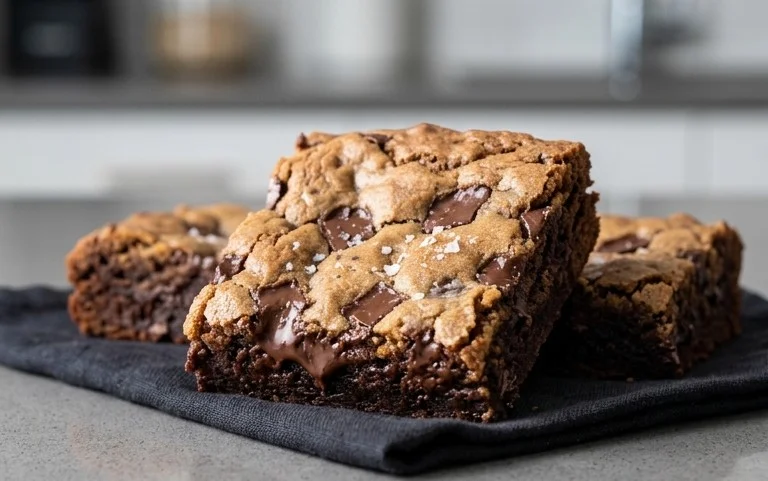
Brown Butter Brookies
Prepare yourselves for a dessert revelation! These Brown Butter Brookies are not just a dessert; they’re an experience. We’re talking about a harmonious marriage of two beloved treats: fudgy, rich brownies and chewy, decadent cookies, all elevated by the nutty, caramel notes of brown butter. The result is a layered masterpiece that offers the best of both worlds in every single bite. If you’ve ever struggled to choose between a brownie and a cookie, your dilemma is officially over. This recipe delivers on both fronts, creating a truly unforgettable indulgence. The secret weapon here is undoubtedly the brown butter, which transforms the humble butter into a flavor powerhouse. Don’t be intimidated by the browning process; it’s surprisingly simple and the payoff is immense. Let’s get baking!
Ingredients:
Brownie Layer Preparation
1. Brown the Butter: The foundation of these incredible brookies starts with browning the butter for the brownie layer. Take your first portion of 180g of unsalted butter and place it in a light-colored saucepan over medium heat. Watch it closely! Initially, it will melt, then it will start to foam. As the foam subsides, you’ll see tiny brown specks begin extract to form at the bottom of the pan. Swirl the pan occasionally. You’re looking for a rich, nutty aroma and a beautiful amber color. This process typically takes about 5-8 minutes. Be careful not to burn it – burnt butter is bitter and will ruin the flavor. Once it reaches that perfect golden-brown hue and smells wonderfully toasty, immediately remove it from the heat and pour it into a heat-safe bowl to stop the cooking process. Let it cool slightly for a few minutes.
2. Melt the Chocolate: While your brown butter is cooling, it’s time to melt your 320g of chocolate. You can do this using a double boiler method or by microwaving it in short, 30-second intervals, stirring well after each interval. If using a double boiler, place the chopped chocolate in a heatproof bowl set over a saucepan of simmering water, ensuring the bottom of the bowl doesn’t touch the water. Stir until smooth and completely melted. Once melted, add the slightly cooled brown butter to the melted chocolate and stir until fully combined and glossy. This rich, chocolatey mixture will form the heart of our brownie base.
3. Combine Wet Ingredients and Sugars for the Brownie Base: In a large mixing bowl, whisk together the 4 large eggs, 180g of granulated sugar, and 80g of brown sugar until well combined. Don’t overmix at this stage; we’re just looking to incorporate everything smoothly. Now, pour in your melted chocolate and brown butter mixture. Whisk gently until everything is smoothly incorporated. The batter will be thick and luxurious.
4. Incorporate Dry Ingredients for the Brownie Base: In a separate medium bowl, whisk together 120g of all-purpose flour, 50g of cocoa powder, and 2g of salt. Sift these dry ingredients over the wet ingredients in your large mixing bowl. Using a spatula, gently fold the dry ingredients into the wet ingredients until just combined. Be careful not to overmix, as this can lead to tough brownies. A few streaks of flour are okay, as they will disappear during baking. If you’re using the optional 120g of chocolate chunks, gently fold them in now. This brownie batter should be thick and fudgy.
Cookie Dough Layer Preparation
5. Prepare the Cookie Dough: Now for the cookie part! In a medium mixing bowl, cream together the remaining 85g of unsalted butter (softened but not melted), 80g of brown sugar, and 40g of granulated sugar until light and fluffy. You can use an electric mixer for this, or a sturdy whisk and some elbow grease. Beat in the 1 large egg and 1g of salt until well combined and the mixture is smooth. Finally, add the remaining 85g of all-purpose flour and mix on low speed or with a spatula until just combined. The cookie dough will be soft and pliable.
Assembling and Baking the Brookies
1. Layering the Magic: Preheat your oven to 175°C (350°F). Line a 9×13 inch baking pan with parchment paper, leaving some overhang on the sides to help with lifting. First, spread the brownie batter evenly into the prepared baking pan, smoothing the top with a spatula. Next, dollop spoonfuls of the cookie dough evenly over the brownie batter. Don’t worry about covering it completely; you want to create distinct pockets of cookie dough. Using the back of a spoon or your fingers, gently swirl the cookie dough into the brownie batter, creating beautiful marbling. This swirling is what gives brookies their signature look.
2. Baking to Perfection: Place the pan in the preheated oven and bake for approximately 30-35 minutes. You’re looking for the edges of the brookies to be set, the center to be mostly set but still have a slight wobble, and the cookie dough portions to be golden brown and look cooked through. A toothpick inserted into the brownie part should come out with moist crum extractbs, not wet batter. Be careful not to overbake, as this will result in dry brookies.
3. Cooling and Cutting: Once baked, remove the pan from the oven and let the brookies cool completely in the pan on a wire rack. This is crucial for them to set properly. Trying to cut them while warm will result in a messy situation. Once fully cooled, use the parchment paper overhang to lift the entire slab out of the pan. Cut into squares or bars. The cooling process allows the flavors to meld and the textures to fully develop, making them even more delicious. Enjoy these incredible Brown Butter Brookies!
Conclusion:
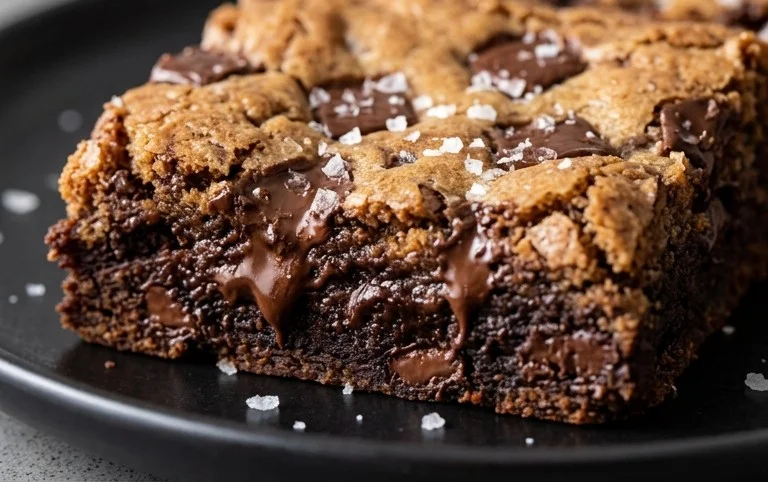
There you have it – your guide to crafting the most incredible Brown Butter Brookies! This recipe is a true triumph, blending the rich, nutty notes of brown butter with the chewy, decadent delight of a perfect brownie, all swirled together with a gooey, buttery cookie dough. It’s the ultimate dessert fusion, offering a sophisticated flavor profile that’s surprisingly approachable for home bakers. The depth of flavor from the brown butter alone elevates these brookies from good to absolutely unforgettable. I truly hope you give these a try; they are a guaranteed crowd-pleaser and a wonderful way to treat yourself or share some baked happiness.
For serving, these brookies are best enjoyed slightly warm, allowing the chocolate to be extra melty. They’re fantastic on their own, but consider pairing them with a scoop of vanilla bean ice cream for an extra layer of indulgence, or a drizzle of salted caramel. If you’re feeling adventurous, try adding a sprinkle of sea salt on top before baking to enhance all those wonderful flavors. Don’t be afraid to experiment with your favorite chocolate chips – dark, milk, or white chocolate all work beautifully here!
Frequently Asked Questions:
Can I make the brownie and cookie dough components separately?
Absolutely! You can prepare the brownie batter and the cookie dough separately, then layer or swirl them in your baking pan. This gives you more control over the distribution of each element, although the swirling method in the recipe creates a beautiful marbled effect and ensures a delightful combination in every bite of your Brown Butter Brookies.
How should I store leftover brookies?
Store leftover brookies in an airtight container at room temperature for up to 3 days. If the weather is particularly warm, or if you prefer them a bit firmer, you can store them in the refrigerator. They are delicious eaten cold, or you can gently warm them up in a microwave for a few seconds to revive their gooey texture.
Brown Butter Brookies
A delicious fusion of rich brownie and chewy cookie, featuring nutty brown butter and decadent chocolate.
Ingredients
-
180 g unsalted butter, browned
-
320 g semi-sweet chocolate, melted
-
120 g all purpose flour
-
50 g unsweetened cocoa powder
-
180 g granulated sugar
-
80 g brown sugar
-
2 g salt
-
4 large eggs
-
120 g chocolate chunks (optional)
-
85 g all-purpose flour
-
80 g unsalted butter
-
80 g brown sugar
-
40 g granulated sugar
-
1 g salt
-
1 large egg
Instructions
-
Step 1
For the brownie layer: Melt 180g butter until browned and nutty. Stir in 320g melted chocolate. In a separate bowl, whisk together 120g flour, 50g cocoa powder, 180g granulated sugar, 80g brown sugar, and 2g salt. Add the chocolate mixture and 4 eggs to the dry ingredients and mix until just combined. Pour into a greased 9×13 inch baking pan. -
Step 2
For the cookie layer: In a large bowl, cream together 80g softened butter, 80g brown sugar, and 40g granulated sugar until light and fluffy. -
Step 3
Beat in 1 large egg and 1g salt into the cookie dough mixture. -
Step 4
Gradually add 85g all-purpose flour to the cookie dough, mixing until just combined. Fold in 120g chocolate chunks, if using. -
Step 5
Dollop spoonfuls of the cookie dough over the brownie batter in the pan. Spread gently to cover. -
Step 6
Bake at 175°C (350°F) for 30-35 minutes, or until the edges are set and a toothpick inserted into the center comes out with moist crumbs. -
Step 7
Let cool completely before cutting into squares.
Important Information
Nutrition Facts (Per Serving)
It is important to consider this information as approximate and not to use it as definitive health advice.
Allergy Information
Please check ingredients for potential allergens and consult a health professional if in doubt.