Cardamom Fig Thumbprint Cookies- Deliciously Sweet
Cardamom Fig Thumbprint Cookies are more than just a sweet treat; they’re a little bite of pure joy, a delightful fusion of warm spice and luscious fruit that I absolutely adore. There’s something undeniably comforting about the aroma of cardamom filling the kitchen as these bake, a scent that instantly evokes cozy afternoons and happy gatherings. What truly sets these Cardamom Fig Thumbprint Cookies apart is the beautiful marriage of textures and flavors. The tender, slightly crum extractbly cookie base, infused with the aromatic magic of cardamom, cradles a jewel-like fig jam filling that bursts with concentrated sweetness. It’s a sophisticated yet utterly approachable cookie that appeals to both the adventurous palate and those seeking classic comfort. Whether you’re looking for a festive bake or just a moment of delicious indulgence, these cookies are guaranteed to impress.
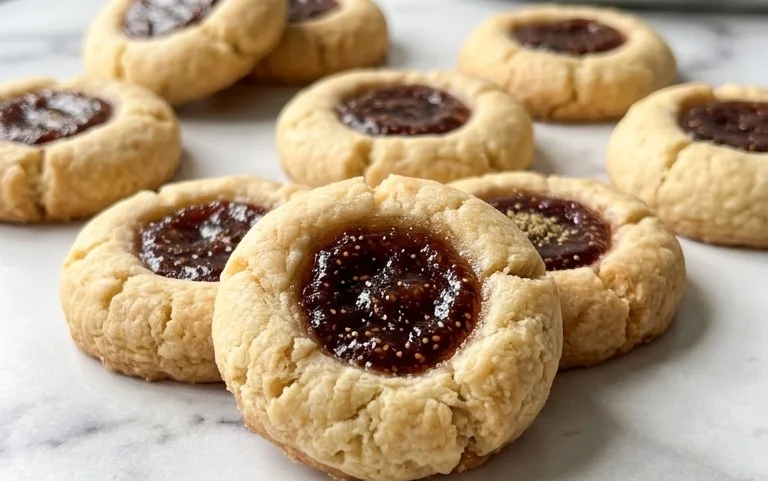
Cardamom Fig Thumbprint Cookies
There’s something undeniably comforting about a warm, slightly spiced cookie, especially one adorned with a sweet, fruity center. These Cardamom Fig Thumbprint Cookies are exactly that – a delightful blend of fragrant cardamom, tender buttery cookie dough, and the rich sweetness of fig jam. They’re perfect for your afternoon tea, a special occasion, or simply when you crave a homemade treat that feels both elegant and incredibly easy to make. The subtle warmth of cardamom infused into the cookie base is truly magical, elevating it beyond a simple shortbread and making it a star in its own right. The bright, slightly tart fig jam peeking out from the thumbprint creates a beautiful contrast in both flavor and color. Get ready to fill your kitchen with the most wonderful aroma as you bake these gems!
Ingredients:
Crafting Your Cardamom Fig Thumbprint Cookies
Let’s get started on these delightful cookies. The process is straightforward, focusing on creating a tender dough that holds its shape beautifully while baking. We’ll be combining classic cookie-making techniques with a touch of spice to create something truly special.
Preparing the Dry Ingredients
First, in a medium bowl, we’ll combine all of our dry ingredients. This ensures that the leavening agents and salt are evenly distributed throughout the flour, which is crucial for consistent baking. Whisk together the 2 cups of flour, 1/4 teaspoon of salt, and 1/4 teaspoon of baking soda. This simple step prevents pockets of salt or baking soda from affecting the texture and rise of your cookies. Now, add the star spice: 1 teaspoon of ground cardamom. Give it another good whisk to make sure that fragrant spice is thoroughly incorporated into the flour mixture. Set this bowl aside for now.
Creaming the Butter and Sugar
In a separate, larger bowl, we’ll begin extract by creaming together the softened butter and sugar. Make sure your butter is truly softened, not melted. It should be pliable enough to press your finger into without resistance. Cream together 1 cup of softened butter and 3/4 cup of sugar. This is a crucial step for creating a light and tender cookie. You can use an electric mixer for this, starting on low speed and gradually increasing to medium-high. Beat the butter and sugar until the mixture is light, fluffy, and pnon-alcoholic ale yellow in color. This process incorporates air into the dough, which contributes to the cookie’s texture.
Incorporating Wet Ingredients
Once you have that beautifully creamed butter and sugar mixture, it’s time to add the wet ingredients. Beat in 1 teaspoon of vanilla extract until it’s well combined. Then, add your egg substitute or traditional egg. If you’re using a plant-based egg substitute, ensure it’s a prepared one, ready to use as directed on its packagin extractg. Beat the mixture until everything is smooth and homogenous. The addition of the egg helps bind the ingredients together and adds richness.
Combining Wet and Dry Mixtures
Now, we’ll gradually add the dry ingredients to the wet ingredients. It’s best to do this in a few additions, mixing on low speed or by hand with a spatula. Start by adding about a third of the flour mixture to the butter mixture and mix until just combined. Then, add another third and mix again. Finally, add the remaining flour mixture and mix until no dry streaks of flour remain. Be careful not to overmix at this stage, as overmixing can develop the gluten in the flour, leading to tougher cookies. We’re aiming for a soft, cohesive dough.
Forming and Filling the Thumbprints
Once your dough is ready, it’s time to shape the cookies. You can use a cookie scoop (about 1-inch or a heaping tablespoon) to portion the dough, or simply roll the dough into small balls between your palms. Place the dough balls about 2 inches apart on a baking sheet lined with parchment paper. This spacing allows them room to spread slightly as they bake. Now, for the ‘thumbprint’ part: use your thumb or the back of a small spoon to create an indentation in the center of each cookie dough ball. Make sure the indentation is deep enough to hold a good amount of jam, but not so deep that it breaks through the bottom of the cookie.
Adding the Figgy Center
With your thumbprints ready, it’s time to fill them with that luscious fig jam. Spoon about 1 teaspoon of fig jam into each indentation. You don’t want to overfill, as the jam can bubble over during baking. If your fig jam is very thick, you might want to give it a stir to loosen it up slightly before spooning. The heat of the oven will gently cook the jam, making it even more flavorful and slightly caramelized around the edges.
Baking and Cooling
Preheat your oven to 350°F (175°C). Bake the cookies for approximately 12-15 minutes, or until the edges are lightly golden brown and the centers appear set. The baking time can vary slightly depending on your oven, so keep an eye on them. Once they’re done, let the cookies cool on the baking sheet for about 5 minutes before carefully transferring them to a wire rack to cool completely. This initial cooling period on the baking sheet allows them to firm up, preventing them from breaking when you move them.
The Finishing Touch (Optional Dusting)
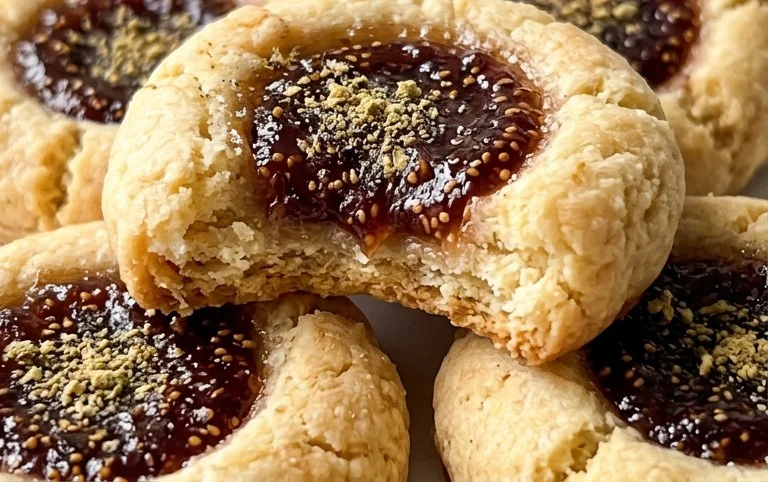
Once the cookies have cooled completely, you can add an optional dusting of confectioner’s sugar for a touch of elegance. Place about 4 tablespoons of confectioner’s sugar in a small sieve and gently tap it over the cookies. This creates a lovely, snowy finish that complements the rich color of the fig jam beautifully. These Cardamom Fig Thumbprint Cookies are best enjoyed at room temperature, allowing all the flavors to meld together perfectly. Store any leftovers in an airtight container at room temperature for up to 3-4 days. Enjoy every delightful bite!
Conclusion:
I truly hope you’ve enjoyed exploring the delightful world of Cardamom Fig Thumbprint Cookies! These little bites of heaven are a testament to how simple ingredients can create something truly magical. The warm, aromatic embrace of cardamom beautifully complements the sweet, slightly jammy fig filling, resulting in a cookie that’s both comforting and sophisticated. They’re incredibly versatile, perfect for your next afternoon tea, a special holiday treat, or simply when you need a little pick-me-up with your coffee.
Don’t hesitate to get creative with serving! They’re fantastic on their own, but consider a dusting of powdered sugar for an extra touch of elegance, or serve them alongside a scoop of vanilla bean ice cream for a decadent dessert. For variations, you can swap the fig jam for apricot or even a tart cherry preserve. A pinch of orange zest added to the dough can also introduce a lovely citrus note. I wholeheartedly encourage you to bake these Cardamom Fig Thumbprint Cookies – I promise, your taste buds will thank you!
Frequently Asked Questions:
Can I make these cookies ahead of time?
Absolutely! These cookies store beautifully in an airtight container at room temperature for up to 3-4 days. In fact, I often find they taste even better on the second day as the flavors meld together even more. You can also freeze the baked cookies for longer storage.
What if I don’t have fresh figs for the jam?
No problem at all! Store-bought fig jam or fig preserves work wonderfully. Just ensure it’s a good quality jam with a nice, thick consistency. Other fruit preserves like apricot or even a good quality raspberry jam can also be used as a delicious substitute.
Cardamom Fig Thumbprint Cookies
Delicate thumbprint cookies infused with aromatic cardamom and filled with sweet fig jam.
Ingredients
-
1 tsp Ground cardamom
-
2 cups Flour
-
1/4 tsp Salt
-
1/4 tsp Baking soda
-
3/4 cup Sugar
-
1 cup Butter (softened)
-
1 tsp Vanilla
-
1 tbsp Prepared plant-based egg substitute
-
1 jar Fig jam
-
4 tbsp Confectioner’s sugar
Instructions
-
Step 1
Preheat oven to 350°F (175°C). Line baking sheets with parchment paper. -
Step 2
In a medium bowl, whisk together flour, ground cardamom, salt, and baking soda. -
Step 3
In a large bowl, cream together softened butter and sugar until light and fluffy. Beat in vanilla and plant-based egg substitute. -
Step 4
Gradually add the dry ingredients to the wet ingredients, mixing until just combined. Do not overmix. -
Step 5
Roll dough into 1-inch balls. Place on prepared baking sheets and use your thumb to create an indentation in the center of each cookie. -
Step 6
Spoon about 1/2 teaspoon of fig jam into each indentation. -
Step 7
Bake for 12-15 minutes, or until edges are lightly golden. -
Step 8
Let cookies cool on baking sheets for a few minutes before transferring to a wire rack to cool completely. Dust with confectioner’s sugar if desired.
Important Information
Nutrition Facts (Per Serving)
It is important to consider this information as approximate and not to use it as definitive health advice.
Allergy Information
Please check ingredients for potential allergens and consult a health professional if in doubt.