Crispy Chewy Chocolate Chip Cookies- Perfect Recipe
Crispy and chewy chocolate chip cookies are a universally beloved treat for a reason. There’s something undeniably comforting and joyous about biting into a perfectly baked cookie that offers that delightful contrast of a slightly crisp edge giving way to a wonderfully soft and chewy center, all studded with pockets of molten chocolate. We all have our ideal chocolate chip cookie, right? For me, it’s that magical balance – not too cakey, not too brittle, but a true masterpiece of texture.
What makes these particular crispy and chewy chocolate chip cookies so special?
It’s the careful combination of ingredients and a simple technique that guarantees that sought-after texture every single time. Forget those cookies that turn out flat and greasy, or dry and crum extractbly. These are the cookies you’ll dream about, the ones that will have everyone asking for the recipe. Get ready to elevate your cookie game and create a batch of the most irresistible crispy and chewy chocolate chip cookies you’ve ever tasted!
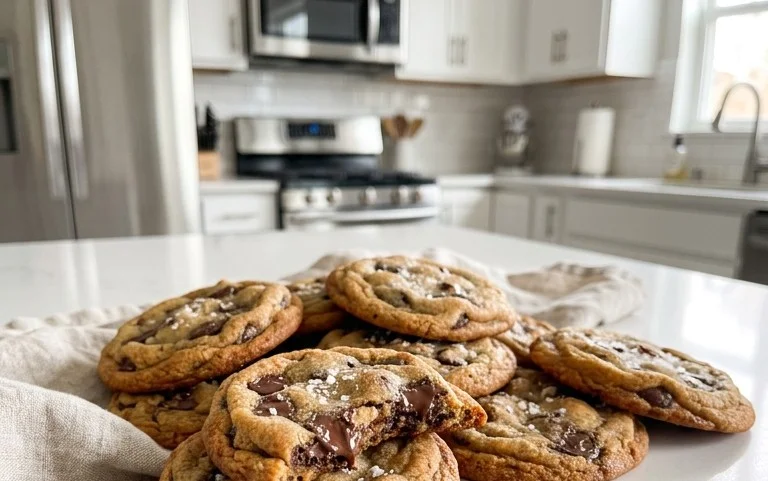
Crispy and Chewy Chocolate Chip Cookies
There’s something undeniably magical about a perfect chocolate chip cookie. For me, the ideal cookie strikes that harmonious balance between a delightful crisp around the edges and a wonderfully chewy center. It’s a texture that makes you want to savor every bite. After countless batches and plenty of taste-testing (a tough job, I know!), I’ve finally perfected a recipe that consistently delivers this dream cookie. This recipe is all about embracing simple, high-quality ingredients and a few key techniques that elevate your cookie game. Get ready to impress yourself and everyone around you with these incredibly satisfying treats!
Ingredients:
Instructions:
Step 1: Prepare Your Dry Ingredients
The foundation of any great cookie starts with properly measured and combined dry ingredients. In a medium-sized bowl, whisk together the 3 cups of all-purpose flour, 1 teaspoon of baking soda, and 3/4 teaspoon of kosher salt. Whisking these ingredients thoroughly ensures that the leavening agent (baking soda) and salt are evenly distributed throughout the flour. This is crucial for consistent rising and flavor in your cookies. If you don’t distribute the baking soda evenly, you might end up with pockets of bitterness or flat spots in your cookies. Set this bowl aside for now.
Step 2: Cream the Butter and Sugars
This is where a lot of the magic for texture happens! In a large mixing bowl, or the bowl of your stand mixer fitted with the paddle attachment, cream together the 2 sticks of softened unsalted butter, 1 cup of packed light brown sugar, and 1 cup of granulated sugar. Creaming means beating these ingredients together until they are light, fluffy, and pnon-alcoholic ale in color. This process incorporates air into the mixture, which contributes to the cookies’ tender texture and helps them spread just the right amount. I like to beat this mixture for at least 3-5 minutes on medium speed. You’ll notice the mixture becomes significantly lighter and increases in volume. Make sure your butter is truly softened, not melted. Softened butter will yield to gentle pressure from your finger but won’t be greasy or liquidy.
Step 3: Incorporate the Eggs and Vanilla
Once your butter and sugar mixture is perfectly creamed, it’s time to add the wet ingredients. Add the 2 large eggs, one at a time, beating well after each addition until fully incorporated. It’s important to add them one by one to ensure they emulsify properly with the butter and sugar. Next, stir in the 2 teaspoons of pure vanilla extract. Vanilla is a flavor enhancer here; it complements the sweetness of the sugars and the richness of the chocolate beautifully. Scrape down the sides of the bowl periodically to make sure all ingredients are getting incorporated evenly. The mixture should be smooth and homogenous.
Step 4: Combine Wet and Dry, Then Add Chocolate
Now, we’ll gradually add the dry ingredients to the wet ingredients. With the mixer on low speed, add the flour mixture to the wet ingredients in three additions, mixing until just combined after each addition. Be careful not to overmix the dough at this stage. Overmixing can develop the gluten in the flour too much, leading to tough cookies. You want to see just a few streaks of flour remaining before you add the next portion. Once the flour is almost fully incorporated, it’s time for the star of the show: the chocolate chips! Add the 2 1/2 cups of semisweet chocolate chips. You can use your mixer on the lowest speed for a few seconds, or better yet, stir them in gently by hand with a sturdy spatula or wooden spoon. This ensures they are distributed evenly without breaking them up too much.
Step 5: Chilling the Dough (Optional but Recommended for Best Results!)
This is a step that many people skip, but I cannot stress enough how much it impacts the final cookie. For the absolute best crispy and chewy texture, I highly recommend chilling your cookie dough for at least 30 minutes, or even better, for a few hours or overnight in the refrigerator. Chilling the dough allows the flour to hydrate fully, which makes for a chewier cookie. It also solidifies the fat in the butter, preventing the cookies from spreading too much and becoming flat and greasy. If you’re short on time, even a 30-minute chill in the freezer will make a noticeable difference. When you’re ready to bake, preheat your oven to 375°F (190°C). Line baking sheets with parchment paper.
Step 6: Baking and Finishing Touches
Scoop rounded tablespoons of the chilled dough onto your prepared baking sheets, leaving about 2 inches between each cookie to allow for spreading. For a professional look and even baking, I like to roll my scooped dough into a ball. If you’re using the optional flaked sea salt, now is the time to sprinkle a tiny pinch over the top of each cookie dough ball. This adds a delightful salty counterpoint to the sweet cookie and melted chocolate. Bake for 9-12 minutes, or until the edges are golden brown and the centers still look slightly underbaked. They will continue to cook on the hot baking sheet. Resist the urge to overbake! For that perfect chewy center, pulling them out when they look a little soft is key. Let the cookies cool on the baking sheet for 5-10 minutes before transferring them to a wire rack to cool completely. This allows them to set up properly. Enjoy your incredibly crispy and chewy homemade chocolate chip cookies!
Conclusion:
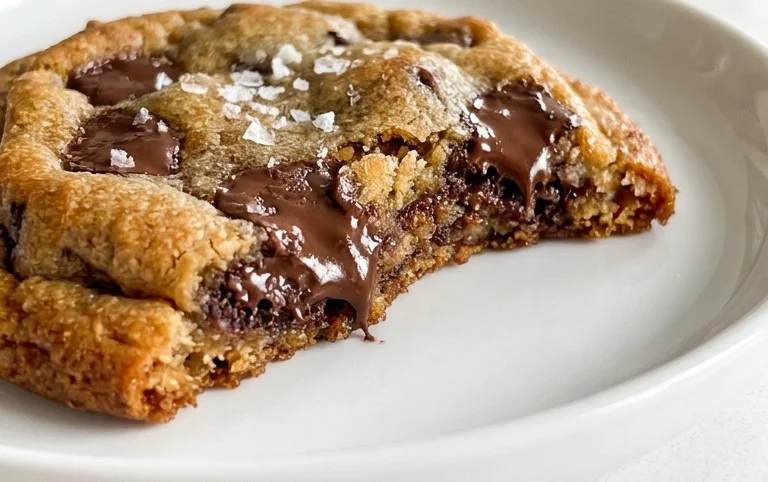
There you have it – the ultimate guide to achieving those perfect crispy and chewy chocolate chip cookies! This recipe is fantastic because it strikes that ideal balance: delightfully crispy edges that give way to a wonderfully soft, chewy center, all bursting with rich chocolate flavor. They’re surprisingly easy to make, proving you don’t need to be a professional baker to create something truly special.
These cookies are incredibly versatile. Enjoy them warm, fresh from the oven, with a tall glass of cold milk for a classic treat. They also make for a delightful afternoon pick-me-up alongside a hot cup of coffee or tea. For a truly decadent experience, try crum extractbling one over a scoop of vanilla ice cream for an instant ice cream sandwich!
Don’t be afraid to experiment! You can easily customize this recipe by adding a handful of chopped nuts like walnuts or pecans, a sprinkle of sea salt on top before baking for a sweet and salty kick, or even a swirl of peanut butter into the dough. The possibilities are endless, and the results are always delicious.
So, what are you waiting for? Gather your ingredients, preheat your oven, and get ready to bake a batch of cookies that will have everyone asking for your secret. I encourage you to give this recipe a try – I’m confident you’ll love the results as much as I do!
Frequently Asked Questions:
Why are my cookies not chewy?
If your cookies are turning out too crispy and not chewy enough, it often comes down to the amount of sugar and fat, and baking time. Using more brown sugar than white sugar and ensuring you don’t overbake them are key. Aim to pull them from the oven when the edges are set and golden, but the centers still look slightly underbaked; they’ll continue to cook as they cool on the baking sheet.
Can I make these cookies ahead of time?
Absolutely! The dough can be chilled for up to 3 days, which actually enhances the flavor and texture. You can also scoop the dough balls and freeze them on a baking sheet until solid, then transfer them to a freezer-safe bag or container. Bake them directly from frozen, adding a minute or two to the baking time.
What’s the best way to store crispy and chewy chocolate chip cookies?
To maintain their delightful texture, store cooled cookies in an airtight container at room temperature for up to 3-4 days. If you want to keep them super chewy, some bakers recommend placing a slice of bread in the container; the cookie will absorb moisture from the bread, keeping it soft.
Crispy and Chewy Chocolate Chip Cookies
The perfect chocolate chip cookie recipe for that desirable balance of crispy edges and a chewy center.
Ingredients
-
3 cups All-Purpose Flour
-
1 teaspoon Baking Soda
-
3/4 teaspoon Kosher Salt
-
2 sticks Unsalted Butter, softened
-
1 cup Light Brown Sugar, packed
-
1 cup Granulated (White) Sugar
-
2 large Eggs
-
2 teaspoons Pure Vanilla Extract
-
2 1/2 cups Semisweet Chocolate Chips
-
1 teaspoon Flaked Sea Salt
Instructions
-
Step 1
Preheat oven to 375 degrees F (190 degrees C). Line baking sheets with parchment paper. -
Step 2
In a medium bowl, whisk together the flour, baking soda, and kosher salt. Set aside. -
Step 3
In a large bowl, cream together the softened butter, light brown sugar, and granulated sugar until light and fluffy. -
Step 4
Beat in the eggs one at a time, then stir in the vanilla extract. -
Step 5
Gradually add the dry ingredients to the wet ingredients, mixing until just combined. Stir in the chocolate chips. -
Step 6
Drop rounded tablespoons of dough onto the prepared baking sheets, about 2 inches apart. -
Step 7
Bake for 9 to 11 minutes, or until the edges are golden brown and the centers are still slightly soft. If using, sprinkle with flaked sea salt immediately after removing from the oven. -
Step 8
Let the cookies cool on the baking sheets for a few minutes before transferring them to wire racks to cool completely.
Important Information
Nutrition Facts (Per Serving)
It is important to consider this information as approximate and not to use it as definitive health advice.
Allergy Information
Please check ingredients for potential allergens and consult a health professional if in doubt.