Easy Pickled Red Onions- Quick & Delicious Recipe
Pickled red onions are an absolute game-changer in my kitchen, and once you try them, you’ll understand why they’ve become so incredibly popular. These vibrant, tangy jewels aren’t just a pretty garnish; they’re a flavor powerhouse that can elevate everything from tacos and salads to sandwiches and even your morning eggs. What makes pickled red onions so special? It’s that perfect balance of sharp, sweet, and sour, with that satisfyingly crisp texture that cuts through richness and adds a burst of freshness to any dish. They’re surprisingly simple to make, requiring just a handful of pantry staples and a little bit of patience. I love having a jar of these brilliant pickled red onions ready to go, because they have a magical ability to transform ordinary meals into something extraordinary. Trust me, once you’ve tasted them, you’ll be reaching for them constantly!
Pickled Red Onions: Your Secret Weapon for Flavor!
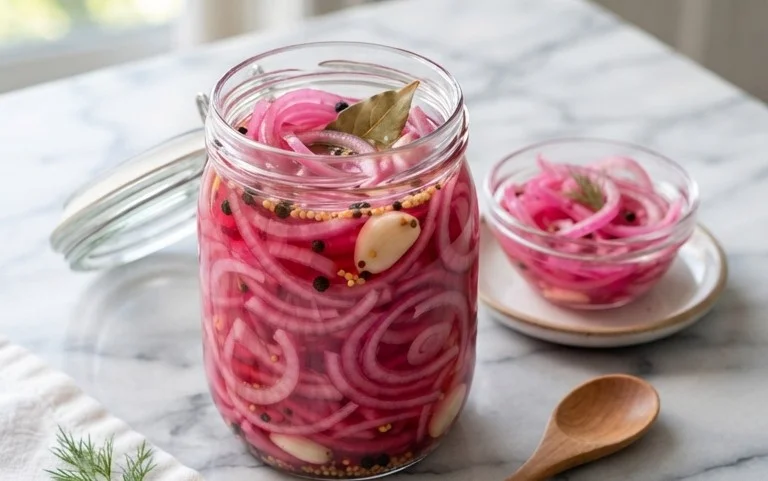
There are some ingredients that just elevate everything they touch. Pickled red onions are undeniably one of them. Their vibrant pink hue is a feast for the eyes, and their tangy, slightly sweet crunch is a burst of flavor that can transform a simple taco, a humble salad, or even a gourmet sandwich into something truly special. Forget store-bought versions that often taste overly sharp or strangely artificial; making your own is incredibly easy and yields a far superior result. This recipe is my go-to, a foolproof method for creating perfect pickled red onions every time. They’re so simple to whip up, you’ll wonder why you haven’t been making them all along. The best part? They only get better with time, becoming a pantry staple you’ll reach for again and again.
Ingredients:
The Simple Magic: How to Pickle Red Onions
The beauty of this recipe lies in its simplicity. You don’t need any fancy equipment or complicated techniques. All it takes is a few basic pantry staples and about five minutes of active prep time. The rest is just waiting for the magic to happen. The vinegar, water, sugar, and salt create a brine that not only preserves the onions but also imbues them with that signature bright, tangy flavor.
Step 1: Prepare Your Onion for Pickling Perfection
The first step is all about getting your red onion ready. Start by peeling away the papery outer skin. Then, halve the onion through the root end. This makes slicing much easier. Next, slice the onion as thinly as you possibly can. A mandoline slicer is fantastic for achieving uniform, paper-thin slices, which allows them to pickle evenly and develop the best texture. If you don’t have a mandoline, a very sharp knife will work. Just aim for consistency – the thinner the slices, the quicker they’ll pickle and the more delicate their texture will be. You can discard the root and stem ends.
Step 2: The Speedy Brine Creation
Now, let’s get that essential brine ready. In a small saucepan, combine the white vinegar and the water. Add your sugar (if using) and the kosher salt. Place the saucepan over medium heat. We’re not boiling this mixture, but rather gently heating it until the sugar and salt have completely dissolved. Stir occasionally to ensure everything is well incorporated. This heating process helps the flavors meld together and makes the brine more readily absorb into the onion slices. Once you see no granules of sugar or salt at the bottom of the pan, remove it from the heat.
Step 3: Marrying the Onion and the Brine
Now for the exciting part! Take your thinly sliced red onions and place them into a clean, heatproof glass jar or a sturdy, non-reactive bowl. Make sure your container is large enough to hold all the onion slices comfortably. The slices will shrink down a bit as they pickle, but it’s good to start with ample space. Carefully pour the warm brine over the sliced onions. Ensure that all the onion slices are submerged in the liquid. If any are floating, gently press them down with a spoon. This is crucial for even pickling.
Step 4: The Infusion Period: Patience is a Virtue
This is where the transformation truly begin extracts. Once the onions are submerged in the brine, cover the jar or bowl tightly. Allow the mixture to cool down to room temperature. This can take about an hour. During this time, you’ll notice the onions starting to soften and, most dramatically, their color will begin extract to bleed into the brine, turning it a beautiful, vibrant pink. This is a visual cue that the pickling process is well underway. Don’t rush this step! Allowing them to cool gradually helps them absorb the flavors without becoming mushy.
Step 5: The Chill Factor: Unlocking Deeper Flavor
Once the pickled red onion mixture has reached room temperature, it’s time to transfer it to the refrigerator. Place the covered jar or bowl in the fridge. For the best flavor, I recommend letting them pickle for at least a couple of hours. However, they will continue to develop flavor and texture over the next 24-48 hours. The longer they sit in the fridge, the more tender and flavorful they will become. You’ll find they are absolutely delicious after a day, and even better after a few. The refrigerator slows down the pickling process, allowing the flavors to deepen and mature.
Enjoy your homemade pickled red onions! They are a fantastic addition to so many dishes. Try them on avocado toast, burgers, fish tacos, salads, or even just straight from the jar (I won’t judge!). They will keep in the refrigerator for several weeks, making them a convenient and flavorful condiment to have on hand.
Conclusion:
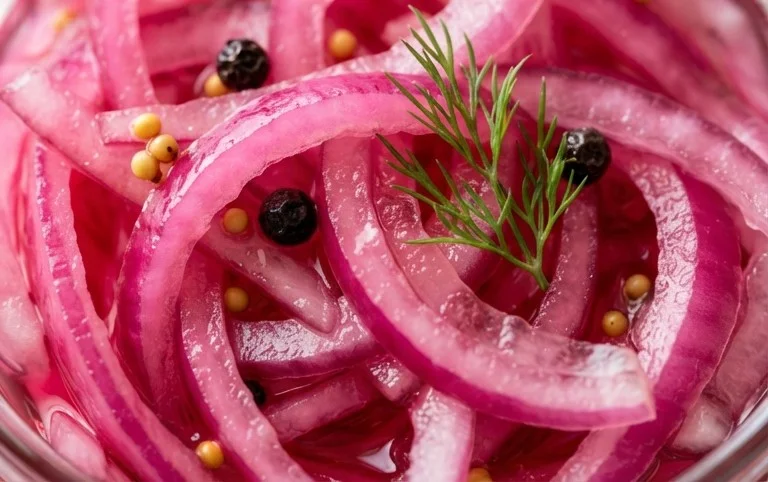
And there you have it! My simple and utterly delightful recipe for pickled red onions is ready to transform your meals. This recipe is a true game-changer because it elevates even the most basic dishes with a vibrant burst of color and a tangy, slightly sweet, and savory punch. The simplicity of the ingredients and the quick pickling process mean you can have these beauties ready in no time. I love how versatile they are, adding a sophisticated touch to everything from tacos and sandwiches to salads and charcuterie boards. Don’t be shy – experiment with them! Consider adding a pinch of chili flakes for a spicy kick, or a sprig of fresh dill for an herbaceous twist. I truly encourage you to give this pickled red onions recipe a try; it’s a small effort for a huge reward in flavor and visual appeal.
Frequently Asked Questions:
How long do pickled red onions last?
Stored in an airtight container in the refrigerator, my pickled red onions typically last for about 2 to 3 weeks. The longer they sit, the more the flavors will meld and intensify, which can be delicious, but they will eventually soften.
Can I use different types of onions?
While red onions are ideal for their beautiful color and slightly milder flavor, you can experiment with other onions like white or yellow onions. Keep in mind that the color won’t be as striking, and the flavor profile might be a bit sharper. Shallots also pickle wonderfully and offer a more delicate taste.
What if I don’t have apple cider vinegar?
White grape juice vinegar or red grape juice vinegar are excellent substitutes for apple cider vinegar. They will provide a similar tangin extractess. Just ensure you’re using a vinegar with at least 5% acidity, as this is crucial for the pickling process and food safety.
Pickled Red Onions
Quick and easy pickled red onions that add a bright, tangy crunch to salads, tacos, sandwiches, and more. A versatile condiment with a vibrant color.
Ingredients
-
1 large Red onion
-
1 cup White Vinegar
-
1 cup Water
-
1 tablespoon Sugar
-
2 teaspoons Kosher salt
Instructions
-
Step 1
Thinly slice the red onion. A mandoline slicer works best for uniform slices. -
Step 2
In a small saucepan, combine the white vinegar, water, sugar, and kosher salt. Stir until the sugar and salt are dissolved. -
Step 3
Bring the liquid to a simmer over medium heat, then immediately remove from heat. -
Step 4
Place the sliced red onions into a heatproof jar or container. -
Step 5
Pour the hot pickling liquid over the onions, ensuring they are fully submerged. -
Step 6
Let the mixture cool to room temperature, then cover and refrigerate for at least 30 minutes before serving. For best flavor, let them pickle for a few hours or overnight.
Important Information
Nutrition Facts (Per Serving)
It is important to consider this information as approximate and not to use it as definitive health advice.
Allergy Information
Please check ingredients for potential allergens and consult a health professional if in doubt.