Easy Homemade Fruit Leather Recipe-Sweet Healthy Treat
Homemade fruit leather is a nostalgic treat that instantly transports me back to sun-drenched afternoons and carefree days. Who doesn’t remember that satisfying chew and burst of concentrated flavor? It’s more than just a snack; it’s a delightful edible art form that’s surprisingly simple to create in your own kitchen. The beauty of making your own homemade fruit leather lies in its incredible versatility and the control you have over the ingredients. Forget artificial colors and preservatives – you’re in charge of the pure, unadulterated taste of your favorite fruits. This recipe celebrates the vibrant sweetness of nature, allowing you to capture the essence of summer in every chewy strip. Get ready to unlock a world of delicious possibilities and rediscover the magic of this beloved confection.
Homemade Fruit Leather Recipe
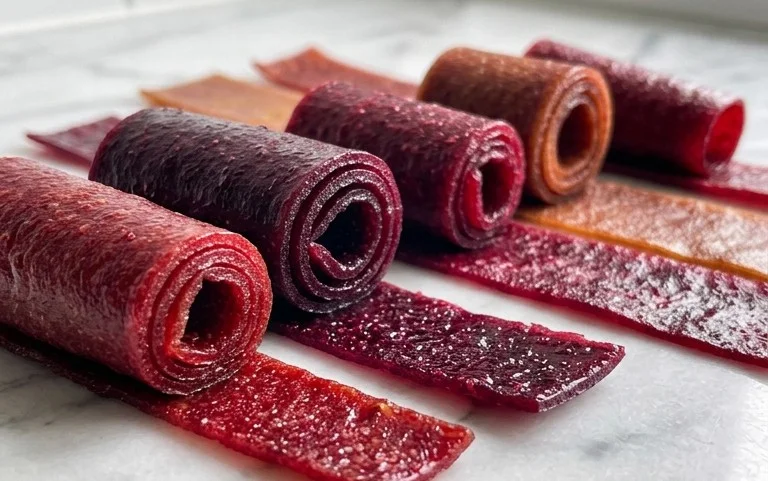
There’s something incredibly satisfying about making your own fruit leather. It’s a fantastic way to preserve seasonal fruit, create a healthy and delicious snack, and avoid all the processed sugars and artificial ingredients found in store-bought versions. Plus, it’s surprisingly easy to whip up a batch in your own kitchen! Imagin extracte the vibrant colors and the intense burst of fruity flavor – it’s a real treat for both the eyes and the taste buds. This recipe is incredibly versatile; you can use almost any fruit you have on hand, from ripe berries to sweet peaches.
Ingredients:
Instructions:
Prepare Your Fruit:
The first step is to get your fruit ready. Wash your chosen fruit thoroughly under cool running water. If you’re using larger fruits like peaches or apples, you’ll want to peel them and remove the cores or pits. For berries, a quick rinse is usually enough. Chop the fruit into relatively small, uniform pieces. This will help it cook down more evenly and blend more smoothly. If you’re using fruits with skins that can be tough, like apples or pears, peeling them beforehand will result in a smoother texture for your fruit leather. Don’t be afraid to mix and match fruits for a unique flavor profile! For example, strawberries and rhubarb make a delightful combination, or mango and a hint of lime.
Cook the Fruit Mixture:
Once your fruit is chopped, it’s time to cook it down. Place the chopped fruit in a medium saucepan. Add the white sugar and the fresh lemon juice. The sugar helps to sweeten the fruit leather and also acts as a natural preservative. The lemon juice is crucial for a few reasons: it adds a bright, tangy flavor that balances the sweetness of the fruit and sugar, and it also helps to set the fruit leather, giving it that characteristic chewy texture. Stir everything together to coat the fruit evenly. Place the saucepan over medium heat. Bring the mixture to a gentle simmer, then reduce the heat to low. Continue to cook, stirring occasionally, for about 15-20 minutes, or until the fruit has softened and broken down considerably. You want it to be very tender, almost mushy. This process concentrates the fruit’s natural sugars and flavors, creating a more intense taste for your final product.
Blend Until Smooth:
After the fruit has cooked down, it’s time to create a smooth puree. Carefully transfer the hot fruit mixture to a blender or food processor. Blend on high speed until the mixture is completely smooth and free of any lumps or chunks. If you prefer a very smooth texture, you can push the puree through a fine-mesh sieve at this stage to remove any remaining seeds or fibrous bits. However, for most fruits, especially berries, blending thoroughly will suffice. You’re aiming for a consistency similar to thick applesauce. If the mixture seems too thick to blend easily, you can add a tablespoon of water or fruit juice, but be cautious not to add too much, as you don’t want to make the leather too thin.
Spread and Dehydrate:
Preheat your oven to its lowest setting, typically around 170°F (75°C). Line a baking sheet with parchment paper or a silicone baking mat, ensuring it covers the entire surface. Pour the fruit puree onto the prepared baking sheet. Using an offset spatula or the back of a spoon, spread the puree out into a thin, even layer. Aim for a thickness of about ¼ inch. The thinner you spread it, the faster it will dry. Be sure to spread it all the way to the edges of the parchment paper. This step is critical for even drying. If you have thick and thin spots, the leather will dry unevenly, leading to some parts being too chewy and others too brittle.
Bake and Cool:
Place the baking sheet in the preheated oven. Allow the fruit leather to bake for 4-8 hours, or until it is no longer sticky to the touch and has a leathery, pliable texture. The exact baking time will depend on your oven, the thickness of your fruit layer, and the moisture content of your fruit. Check on it periodically, rotating the baking sheet if you notice uneven drying. You want it to be dry but still flexible; it should peel cleanly from the parchment paper without breaking. Once it’s done, turn off the oven, crack the oven door open slightly, and let the fruit leather cool completely inside the oven. This slow cooling process helps it to firm up further and prevents it from becoming sticky again.
Cut and Store:
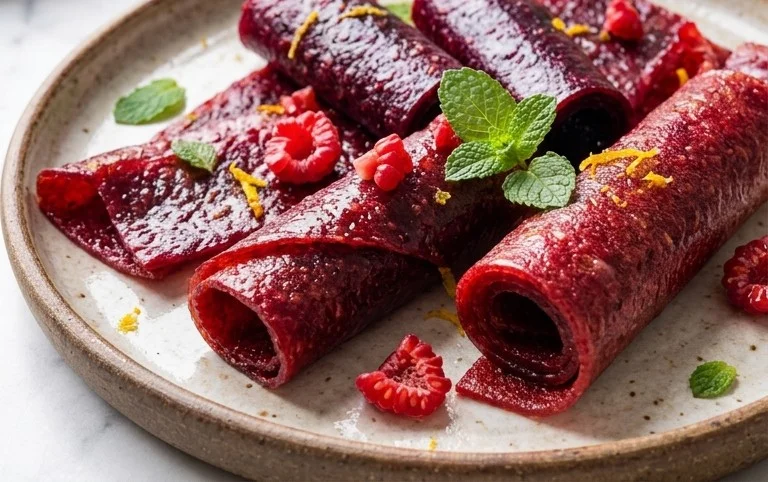
Once the fruit leather is completely cool, carefully peel it off the parchment paper. You can then cut it into strips using a pizza cutter or a sharp knife. Roll up the strips tightly to create individual portions. You can wrap them in parchment paper or wax paper to prevent them from sticking together. Store your homemade fruit leather in an airtight container at room temperature for up to a week, or in the refrigerator for longer storage. It’s a wonderfully portable snack that kids and adults alike will adore! Enjoy your delicious, homemade creation!
Conclusion:
So there you have it – your very own homemade fruit leather recipe! Making fruit leather is an incredibly rewarding and surprisingly simple process that transforms fresh fruit into a delightfully chewy and naturally sweet treat. It’s a fantastic way to utilize seasonal produce, reduce food waste, and create a healthy snack option for yourself and your loved ones. The versatility of this recipe is truly its superpower; you can experiment with an endless array of fruit combinations to discover your personal favorites.
Serve your delicious fruit leather as a fun lunchbox treat, a post-workout energy booster, or even as a unique dessert ingredient. Try rolling it up tightly for individual portions, cutting it into fun shapes with cookie cutters, or even layering it with yogurt for a delightful parfait. Don’t be afraid to get creative with your flavor profiles! Mix berries with apples, add a hint of citrus, or even incorporate a touch of spice like cinnamon or gin extractger for an extra kick. I truly encourage you to give this homemade fruit leather recipe a try – I’m confident you’ll be hooked on its simple goodness!
Frequently Asked Questions about Homemade Fruit Leather:
How long does homemade fruit leather last?
Properly stored homemade fruit leather can last for several weeks at room temperature in an airtight container. For longer storage, you can refrigerate it for up to a couple of months or even freeze it for much longer.
Can I use frozen fruit for this recipe?
Absolutely! Frozen fruit works wonderfully for making fruit leather. Thaw the frozen fruit completely and drain any excess liquid before proceeding with the recipe. You might need to adjust the cooking time slightly, but the end result will be just as delicious.
My fruit leather is sticky. What did I do wrong?
A common reason for sticky fruit leather is not drying it sufficiently. Ensure it’s completely dry to the touch before cutting and rolling. You can also try baking it at a slightly lower temperature for a longer period, or increasing the oven fan if available, to help evaporate more moisture. Sometimes, a very thin layer of parchment paper between rolled pieces can also help prevent sticking.
Homemade Fruit Leather Recipe
Easy homemade fruit leather using your favorite fruits and a touch of sugar and lemon juice. A healthy and delicious snack.
Ingredients
-
2 cups fruit, chopped
-
3 tbsp white sugar
-
juice of ½ whole lemon
-
1 tsp vanilla extract
-
¼ tsp cinnamon
-
pinch of salt
Instructions
-
Step 1
Prepare your fruit: wash, chop, and remove any pits or seeds. For firmer fruits like apples or pears, you may want to peel them. -
Step 2
Cook the fruit: In a saucepan, combine the chopped fruit with the white sugar, lemon juice, vanilla extract, cinnamon, and salt. Cook over medium heat, stirring occasionally, until the fruit is softened and breaks down into a puree. This will take about 10-15 minutes. -
Step 3
Blend the fruit mixture: Once softened, carefully transfer the fruit mixture to a blender or use an immersion blender to create a smooth puree. If the mixture is too thick, add a tablespoon of water at a time until it reaches a pourable consistency. -
Step 4
Prepare for drying: Preheat your oven to its lowest setting, ideally between 140°F and 170°F (60°C and 77°C). Line a baking sheet with parchment paper or a silicone baking mat, ensuring it’s smooth and wrinkle-free. -
Step 5
Spread the puree: Pour the fruit puree onto the prepared baking sheet. Spread it evenly into a thin layer, about 1/8 to 1/4 inch thick, using a spatula. -
Step 6
Dehydrate the fruit leather: Place the baking sheet in the preheated oven. Bake for 4-8 hours, or until the fruit leather is no longer sticky to the touch and peels easily from the parchment paper. The exact time will depend on your oven and the thickness of the layer. -
Step 7
Cool and cut: Once dried, remove the fruit leather from the oven and let it cool completely on the baking sheet. Once cool, carefully peel it off and cut it into desired strips or shapes.
Important Information
Nutrition Facts (Per Serving)
It is important to consider this information as approximate and not to use it as definitive health advice.
Allergy Information
Please check ingredients for potential allergens and consult a health professional if in doubt.